ENG | Raspberry Pi Pico and MicroPython, Getting started
Explore the basics of Raspberry Pi Pico and MicroPython. Learn how to set up your board, install MicroPython, and start programming with a simple LED example.
Introduction

Spring is here and with it comes Pi day! Best time to try a new microcontroller: Raspberry Pi Pico 🙂
What is Raspberry Pi Pico
The Raspberry Pi Pico is a low-cost microcontroller board designed by the Raspberry Pi Foundation. While modest in computing power compared to modern processors, it offers sufficient performance for many hobbyist projects and basic embedded systems, especially considering its price point. The Pico is well-suited for tasks like reading sensors, controlling LEDs, handling basic I/O operations, and running simple real-time applications such as audio processing.
One of the standout features of the Raspberry Pi Pico is its support for MicroPython, a lean and efficient implementation of the Python 3 programming language optimized for microcontrollers. MicroPython allows developers to write code using the familiar and user-friendly Python syntax, while taking advantage of the Pico’s hardware capabilities. This may be beneficial for those who are not familiar with C/C++ and setting up build environments.
Raspberry Pi Pico 2 was released in late summer 2024 (and version with WiFi later in November). It promises more RAM, bigger flash memory, somewhat faster RP2350 processor (especially for floating point operations and/or using proper compiler), slightly lower power consumption, power efficient sleep mode. On some eshops, this made original Pico even cheaper. It does not change anything mentioned in this article.
For compatibility reasons it still has MicroUSB connector :-(
Specifications
| Pico (RP2040) | Pico 2 (RP2350) | |
|---|---|---|
| Clock speed | 133MHz | 150MHz |
| SRAM | 264K | 520K |
| Arm Cores | 2x Arm Cortex-M0+ | 2x Arm Cortex-M33 |
| RISC-V Cores | - | 2x Hazard3 |
| Flash Memory | 2M | 4M |
| Extras | floating point support (Arm cores) security features |
What is not Raspberry Pi Pico
It’s not a single board computer (SBC) similar to Raspberry Pi or Raspberry Pi Zero, but a completely different product. It cannot run operation system. It’s a microcontroller with completely different goal, more similar to popular Arduino, STM32, ESP32, nRF52840 and alike.
What is MicroPython
MicroPython is a compact and efficient implementation of the Python 3 programming language designed specifically for microcontrollers and embedded systems. It brings the simplicity and readability of Python to the world of low-level hardware programming, allowing developers to write code that interacts directly with sensors, actuators, and other peripherals.
While MicroPython shares most of the syntax and features of standard Python, it has been optimized for resource-constrained environments, making it an ideal choice for microcontrollers like the Raspberry Pi Pico. With MicroPython, you can leverage the power of Python to quickly prototype and develop applications for a wide range of projects, from Internet of Things (IoT) devices to robotics and automation systems.
By combining the ease of use and productivity of Python with the low-level control of microcontrollers, MicroPython offers developers a simple approach to embedded programming.”.
Installing MicroPython on Raspberry Pi Pico
Let’s see what official documentation says:
Raspberry Pi Pico Python SDK PDF, page 4:
Raspberry Pi Pico has a BOOTSEL mode for programming firmware over the USB port. Holding the BOOTSEL button when powering up your board will put it into a special mode where it appears as a USB Mass Storage Device. First make sure your Raspberry Pi Pico is not plugged into any source of power: disconnect the micro USB cable if plugged in, and disconnect any other wires that might be providing power to the board, e.g. through the VSYS or VBUS pin. Now hold down the BOOTSEL button, and plug in the micro USB cable (which hopefully has the other end plugged into your computer).
A drive called RPI-RP2 should pop up. Go ahead and drag the MicroPython firmware.uf2 file onto this drive. This programs the MicroPython firmware onto the flash memory on your Raspberry Pi Pico.
It should take a few seconds to program the UF2 file into the flash. The board will automatically reboot when finished, causing the RPI-RP2 drive to disappear, and boot into MicroPython.
- Connect to Pico using microUSB cable while holding
BOOTSELbutton. Pico will appear as a 128MB USB drive. - Download MicroPython for your Raspberry Pico (version 1 or 2 with or without WiFi).
- Now you can upload MicroPython by copying it to small drive.

- It will immediatelly restart and USB drive will disconnect and won’t be available.
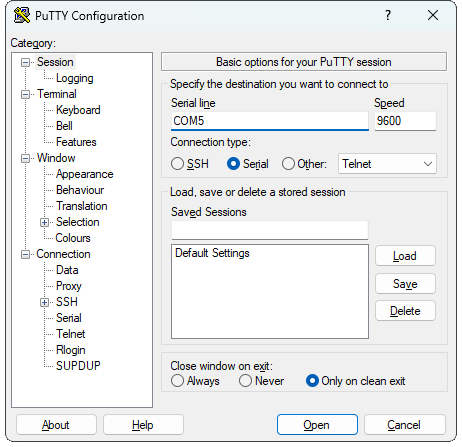
- Windows only: Download PuTTY e.g. via Windows Store.
- Determine to which serial port Pico is attached, e.g. using Device manager on Windows. On Linux try
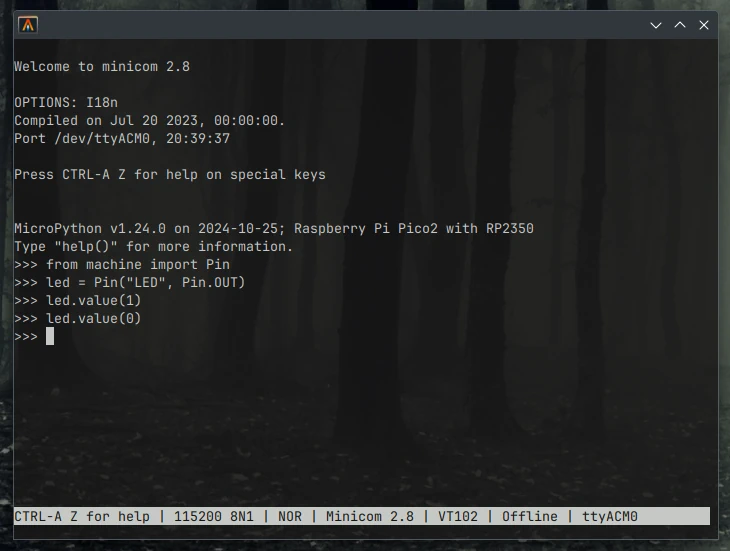
ls -la /dev/serial/by-id(for me it’s/dev/ttyACM0) - Connect to Pico (Serial port, COM5 depends on your config, speed may be 9600 or 115200). On Linux type
minicom -D /dev/ttyACM0.
- Terminal will likely appear, if there is program running, try to abort it using
Ctrl+C. Typehelp()to get some basic, but useful help
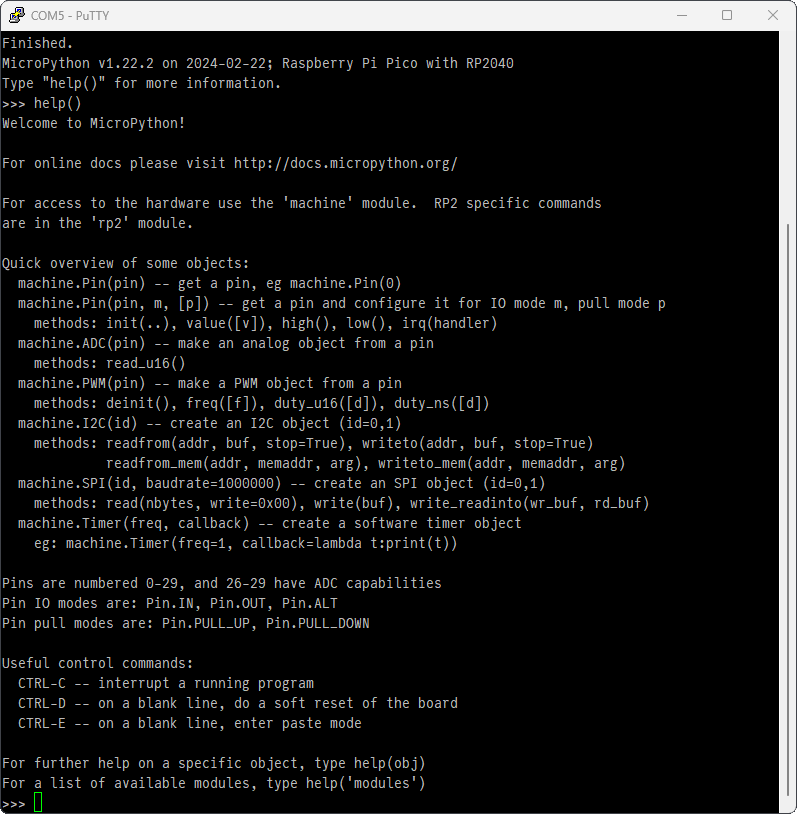
- Now you can try to play with LED using Python shell (or REPL - Read, Eval, Print Loop).
Addendum: Useful tool is Python utility called
mpremote(MicroPython remote) which can be used as terminal or work with files. It is briefly described in later article
MicroPython in Visual Studio Code
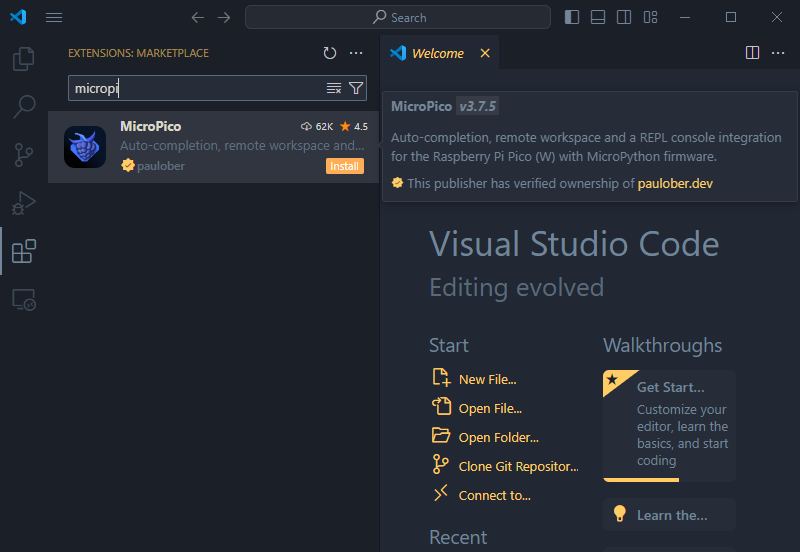
There is now official extension
Raspberry Pi Picowhich seem to contain both C++ and MicroPython support - it actually installs MicroPico as a dependency (as of October 2025). But extension is for C++ and Pico SDK.
- Get Visual Studio Code
- Install MicroPico Extension (former name
Pico-W-Go). If you have Remote-SSH extension, make sure to install it on a local computer)
- Now you can basically click on github link above or read extension page, but step-by-step guide is
- Create new folder (e.g
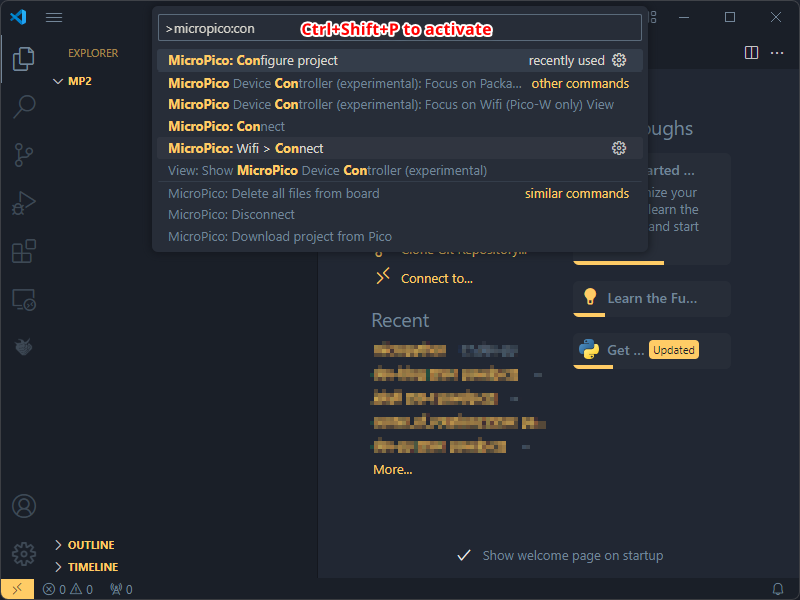
c:\dev-py\mp2for micropython, test2) - Configure project (
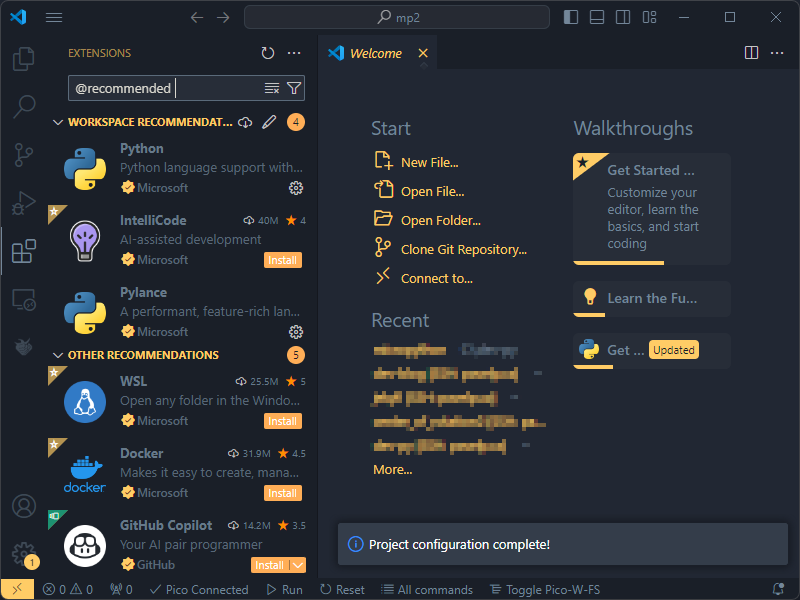
Ctrl+Shift+Pfor commands, searchMicroPico: Configure project) This will create some files and connect to Pico
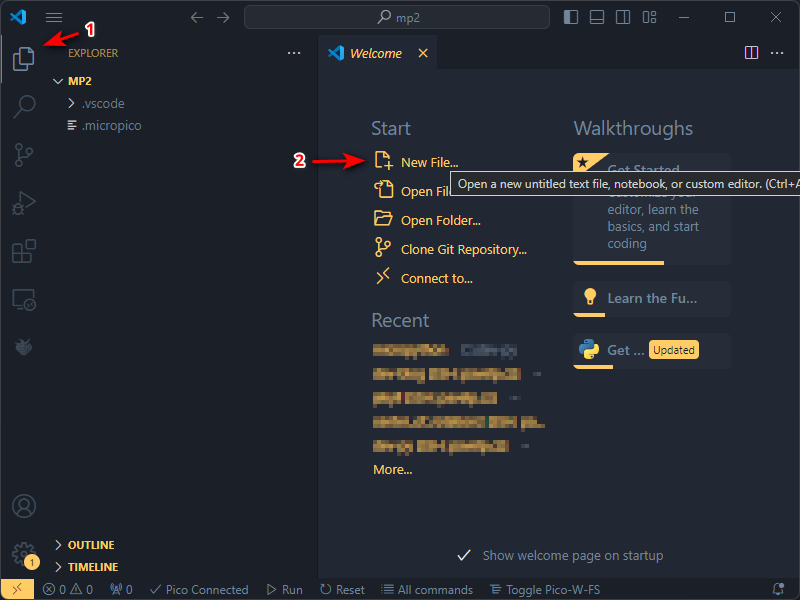
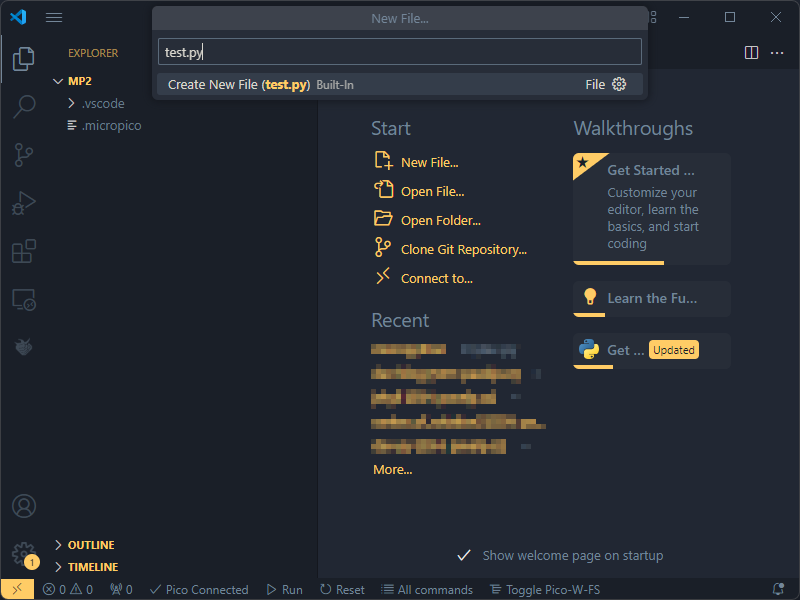
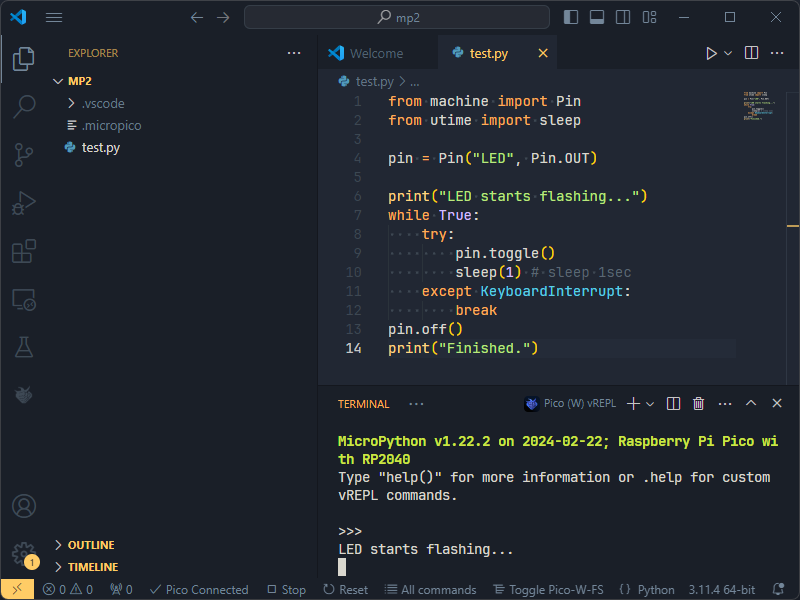
- Create new file (e.g.
test.py)
- Paste example code (from VS Code extension readme)
1
2
3
4
5
6
7
8
9
10
11
12
13
14
from machine import Pin
from utime import sleep

pin = Pin("LED", Pin.OUT)

print("LED starts flashing...")
while True:
    try:
        pin.toggle()
        sleep(1) # sleep 1sec
    except KeyboardInterrupt:
        break
pin.off()
print("Finished.")
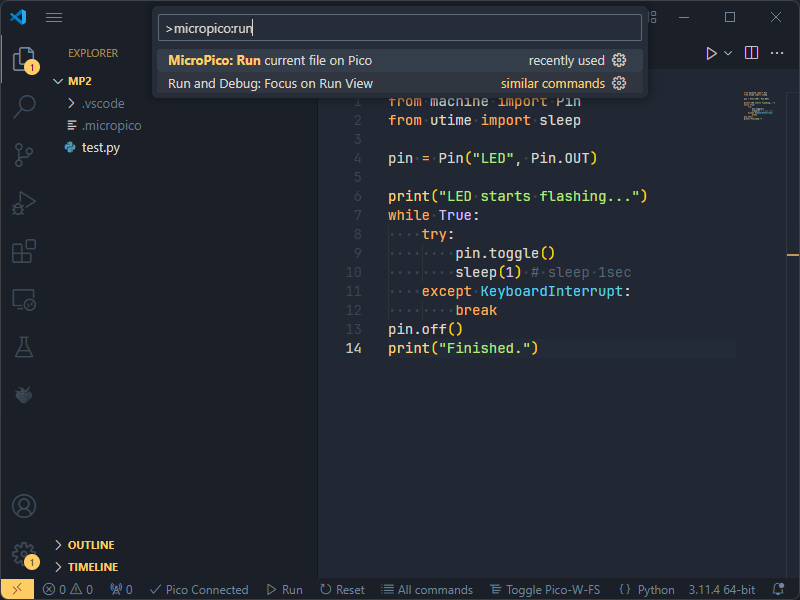
- Run it (
Ctrl+Shift+P:MicroPico: Run current file on Pico) or using icon in the status bar.
- To make your program run at boot, rename file to
main.pychooseMicroPico: Upload project to Pico. However VS Code always retakes control when project is open for editing purposes. - You can download files from Pico, but preferably do it into new, empty directory
- Extra: try
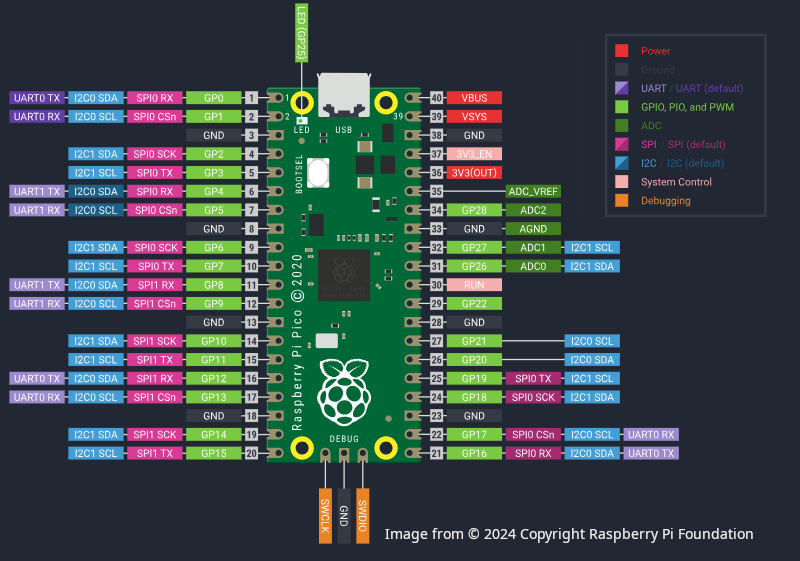
MicroPico: Help > Show Pico Pin Map
- Create new folder (e.g
Pinout
- Pin 40: VBUS 4.5-5.5V from USB BUS
- Pin 39: VSYS 1.8-5.5V input voltage
- Pin 37: 3V3_EN ?
- Pin 36: 3V3 3.3V output, up to 300mA
Summary
This article describes setting of MicroPython and first steps. At the moment I haven’t tried anything but LED, I have only brief idea how to work with sensors and so on and I’m not familiar with powering it by other ways than USB cable to computer.
C++ and it’s possibilities are uncharted territory which waits to be explored in the follow up article.
A key benefits of this hardware is that it does not need any specific software to upload program - just hold the BOOTSEL button during the boot, upload uf2 file and that’s all. Well. MicroPython uses some tricks for uploading file, and there’s Visual Studio Code extension for that.
It’s also certainly more capable than Arduino as it supports DMA transfers etc.
And more flexible as it can use MicroPython, C (via PicoSDK or ZephyrRTOS) and likely FreeRTOS.
Also it’s by far cheaper than Arduino, although there are 3rd party Arduino clones and also option to build your own, using ATMega chip, few electronic parts, and to use advantages of Arduino IDE.
What I kind of do not like is that pin description is on bottom side and boot button is on on top. It makes sense when boot needs to be accessible through the hole in the box, while male/female pin header is soldered to bottom side. Other minor annoyance is that while it has 8 ground pins, there is only one 3V3 pin.
Resources
- How to Use VSCode with Raspberry Pi Pico W and MicroPython a bit outdated, but helpful youtube video.
- Raspberry Pi PICO - Starting With MicroPython + Examples - I2C OLED, ADC, PWM
- MicroPico readme file for VS Code extension.
- Raspberry Pi Documentation - MicroPython official documentation.
- Raspberry Pi Pico Python SDK: A MicroPython environment for RP2040 microcontrollers.
- Getting started with Pico
- The C++ SDK
- Raspberry Pi Pico C/C++ SDK
- Learn Embedded Systems -=- How to Set Up Visual Studio Code to Program the Pi Pico (Windows) YouTube video
- Learn Embedded Systems -=- How to Set Up a Project in Visual Studio Code for the Pi Pico - Blink LED YouTube video
- Gary Explains -=- How to Build a Universal Binary for the Raspberry Pi Pico 2 - Arm & RISC-V in the Same File YouTube video
- Gary Explains -=- Write Fast C/C++ Code for the Raspberry Pi Pico 2 using Visual Studio Code - Best RISC-V Compiler
- MicroPython reference for Raspberry Pi Pico
Changes
- 2024-10-30: RPI Pico 2 and Linux mentioned.
- 2024-10-31: Slight modifications.
- 2025-09-23: mpremote
- 2025-10-09: Few updates, VS Code extension now works on Linux with Pico 2 (unlike last year)