ENG | Linux, Rasberry PI and multimedia: Building a Camera trap
A DIY guide to building a Raspberry Pi camera trap using Linux, exploring audio/video recording, streaming, and challenges of wildlife monitoring.
This article was written in Aprimay 2021 and RaspiOS based on Debian 10 Buster was used. Attempt to finish it was made in May 2024, sadly new RaspiOS based Debian 12 Buster has completely different working solution to video recording.
Introduction
Inspiration was Morten Hilmer’s YouTube Wildlife Live Camera stream with lot of birds and animals on his farm, which started to broadcast on April 2021.
I just wanted something simple to see what Raspberry Pi 3B is capable of and maybe to learn something.
Result
If you want a camera trap look elsewhere. You can get professional, better and working solution cheaper. If you want to learn something about ffmpeg, working with audio and video and streaming on Linux, continue reading.
TODO: make intro, target audience, set expectations
Equipment and tools
I’m trying to get relatively cheap stuff with relatively good quality.
| Category | Product | Price (approx) | Note |
|---|---|---|---|
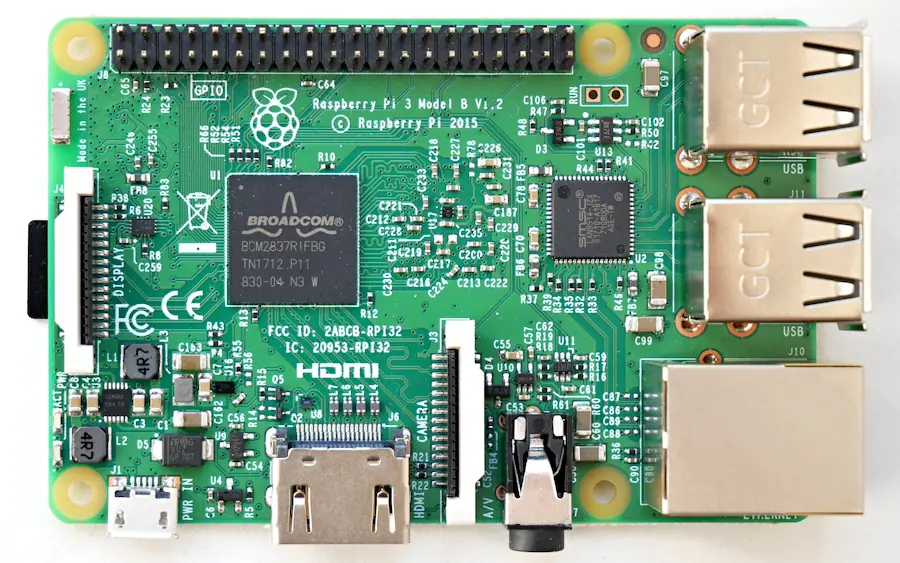
| Single board computer | Raspberry Pi 3B | 38 EUR | Had this since 2017 |
| USB sound card | Axagon ADA-17 Mini HQ | 12 EUR | It’s fine |
| Microphone | Boya BY-MM1 | 35 EUR | Too much bass, sensitive |
| Camera | Waveshare RPi kamera (F) | 24 EUR | Weak IR light |
| SD card | Samsung Micro SDHC 32GB PRO Endurance | 14 EUR |
Tools on Windows:
- Windows Terminal (window store)
- SSH (apps&features -> optional features -> ssh client)
- WinSCP
- VLC Media Player
- Notepad++, NppFTP plugin
Tools on Android phone
- VLC
- Termux
Linux
Use Raspbian! Either listen or be prepared to face consequencies.
First I started with ArchLinux/aarch64, but I gave up. I could not make camera work at all and ffmpeg with h264_v4l2m2m encoder did not work neither. When I tried to find a solution there were either limited set of answers (modprobe this, add this to /boot/config.txt) or “UTFG, it was answered million times”. I like liked arch-based distros, but if it does not work as a tool … maybe it’s time to use what majority uses and what’s intended to be used on Raspberry.
Addendum: Completely different approach is needed even for new RaspiOS. Forget about video4linux, it either does not work, somewhat works or has missing dependencies in a compatibility layer. It’s possible that situation with arch changed.
Software
1
sudo apt install gpac neofetch figlet webp mc fish zopfli webp hdparm nmap netdiscover nginx avahi-daemon
gpac is for mp4box, nmap and netdiscover for network diagnostics. Rest is for conveniences.
Audio
Raspberry PI 3B does not have audio jack for microphone so USB sound card was needed. I chose one that works with Linux and RPI according to user reviews and was one of the cheapest with microphone input: AXAGON ADA-17 MINI HQ. I’m very happy with it, noise level when recording is much lower than from sound card in my PC when I attach microphone to front panel and it runs flawlessly on both Windows and Linux.
Some experiments with audio (microphone and headphones in USB sound card)
System commands
Diagnostics
1
2
3
4
5
pi@weasel ~> lsusb
Bus 001 Device 004: ID 0d8c:0043 C-Media Electronics, Inc.
Bus 001 Device 003: ID 0424:ec00 Standard Microsystems Corp. SMSC9512/9514 Fast Ethernet Adapter
Bus 001 Device 002: ID 0424:9514 Standard Microsystems Corp. SMC9514 Hub
Bus 001 Device 001: ID 1d6b:0002 Linux Foundation 2.0 root hub
Alsa commands
Diagnostic
1
2
3
4
5
6
7
8
9
10
11
12
13
14
15
16
17
18
19
20
21
22
23
24
25
26
27
28
29
30
31
32
33
34
35
36
37
38
39
40
41
42
43
44
45
pi@weasel ~> aplay --list-devices
**** List of PLAYBACK Hardware Devices ****
card 0: Headphones [bcm2835 Headphones], device 0: bcm2835 Headphones [bcm2835 Headphones]
  Subdevices: 8/8
  Subdevice #0: subdevice #0
  Subdevice #1: subdevice #1
  Subdevice #2: subdevice #2
  Subdevice #3: subdevice #3
  Subdevice #4: subdevice #4
  Subdevice #5: subdevice #5
  Subdevice #6: subdevice #6
  Subdevice #7: subdevice #7
card 1: Device [USB Advanced Audio Device], device 0: USB Audio [USB Audio]
  Subdevices: 1/1
  Subdevice #0: subdevice #0

pi@weasel ~> arecord --list-devices
**** List of CAPTURE Hardware Devices ****
card 1: Device [USB Advanced Audio Device], device 0: USB Audio [USB Audio]
  Subdevices: 1/1
  Subdevice #0: subdevice #0

pi@weasel ~> arecord --device "hw:1,0" --dump-hw-params
Recording WAVE 'stdin' : Unsigned 8 bit, Rate 8000 Hz, Mono
HW Params of device "hw:1,0":
--------------------
ACCESS:  MMAP_INTERLEAVED RW_INTERLEAVED
FORMAT:  S16_LE
SUBFORMAT:  STD
SAMPLE_BITS: 16
FRAME_BITS: 32
CHANNELS: 2
RATE: [8000 48000]
PERIOD_TIME: [1000 16384000]
PERIOD_SIZE: [16 131072]
PERIOD_BYTES: [64 524288]
PERIODS: [2 1024]
BUFFER_TIME: (666 32768000]
BUFFER_SIZE: [32 262144]
BUFFER_BYTES: [128 1048576]
TICK_TIME: ALL
--------------------
arecord: set_params:1339: Sample format non available
Available formats:
- S16_LE
Recording and playback
1
2
arecord --device "hw:1,0" -f dat test.wav # -f dat is for -f S16_LE -c2 -r48000, see manual
aplay --device "hw:1,0" test.wav
Note that there is card 1 (USB audio) with device 0 for both recording and playback. Use hw:1,0 as parameter for arecord, aplay, ffmpeg -f alsa -i hw:1,0 etc.
Also note that recording device only supports two channels.
FFMPEG
1
2
ffmpeg -hide_banner -f alsa -ar 22050 -i hw:1,0 -ac 1 test-ffmpeg.mp3
ffplay -hide_banner test-ffmpeg.mp3 # play sound
Note that -ar 22050 is applied to input, but -ac 1 is applied to output which mixes it to mono. You can’t put -ac 1 in front of -i hw:1,0 with this sound card. For ffmpeg order of parameters matters - this converts audio input to mono, but for example AAC codec makes it stereo again as it does not support mono.
By the way as a microphone I’m using Boya BY-MM1. Maybe it’s too sensitive to bass and not so sensitive to heights, but I’m quite happy with it.
TODO: photo of sound card, Boya and RPI
Camera
There are two options:
- USB camera
- CSI camera
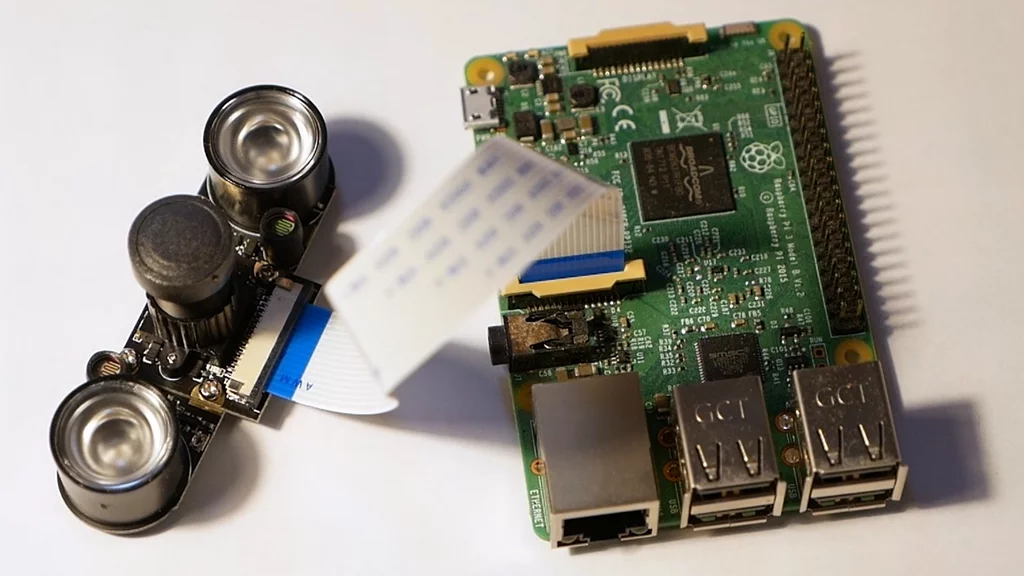
I wanted to try both and evaluate pros and cons, but USB IR camera was not available in the same shop as a rest of the parts, so I have only CSI camera. USB camera can be used for other things and it can encode data itself. To my surprise GPU chip on raspberry can encode data from camera as well, even at 1920x1080 at 30fps (FullHD/30p). I ordered camera with manual focus, IR illumination, and no IR filter Waveshare RPi kamera (F), IR-CUT filter based on OmniVision OV5647 five megapixels sensor which should be compatible with Raspberry Camera v1.3. Sadly this camera captures IR light all the time, which completely ruins daylight colors and everything is pinkish, maybe there are IR blocking filters in photography shops, I haven’t looked.
Assembling camera
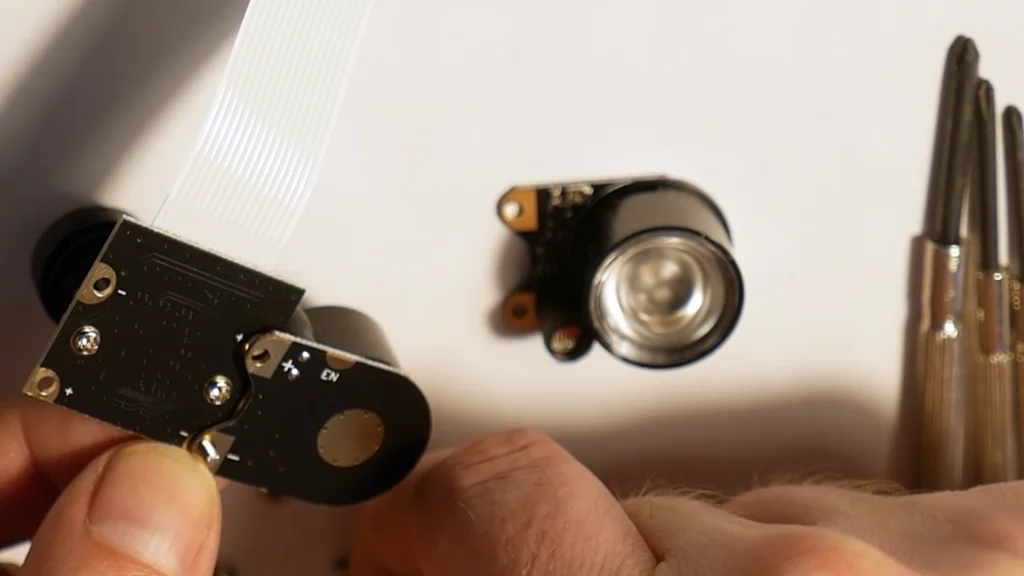
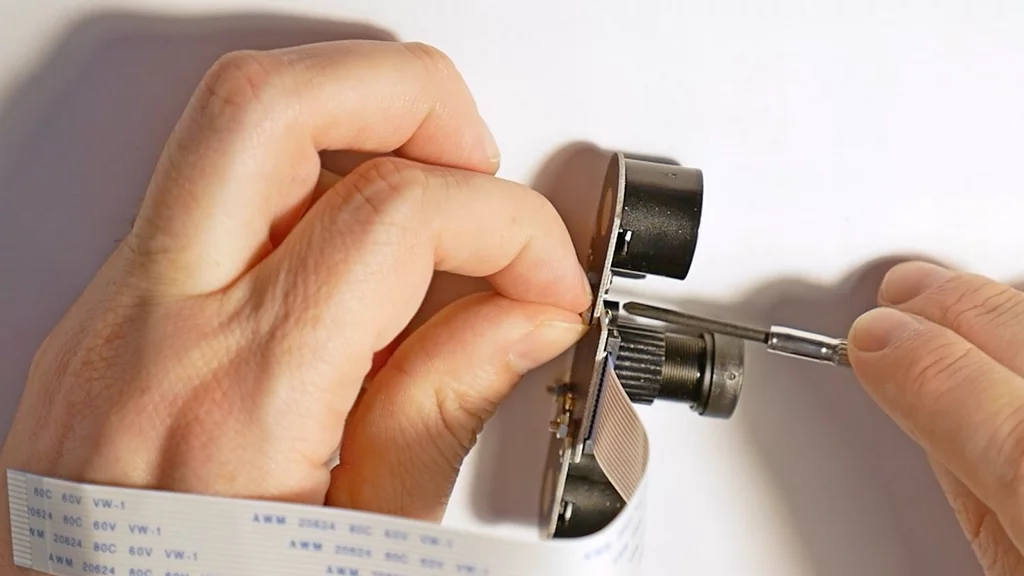
Assembling camera takes maybe 10 minutes including finding tools, but it can be harder with thick fingers. Polarity is marked on back side (see first picture), it’s likely impossible to get it wrong and cable is attached as shown on the third picture (pull beige part of connector, insert cable with blue side towards beige clip, press clip down, ensure that cable is held properly)
Testing camera (Debian 10 Buster)
Enable camera using sudo raspi-config -> Interface options -> Camera.
Good start is to use vcgencmd get_camera command to see if camera works and look for /dev/video0 device on your file system (there are video10-video16 devices for some reson). The next command takes jpeg image which suprisingly contains EXIF data. It worked flawlessly on Raspbian, but not at all with ArchLinux ARM 😥, which does not have raspistill and raspivid utils neither.
1
raspistill -v -o test-cam.jpg
To check video recording the use the following command
1
raspivid -v -w 1920 -h 1080 -t 15000 -b 3000000 -g 90 -o test.h264
| Parameter(s) | Explanation |
|---|---|
-v | verbose |
-w 1920 -h 1080 | width, height in pixels |
-r 180 | rotate by 180 degress (upside down) |
-t 15000 | record for 15000ms/15s |
-b 3000000 | bitrate 3Mbps |
-g 90 | keyframe every 90 frames |
-o test.h264 | output file test.h264 |
This can be passed to pipe using raspivid -w 1920 -h 1080 -t 0 -b 3000000 -g 90 -o - | ffmpeg -hide_banner -re -i - -codec:v copy output3.mp4. Alternatively h264 stream can be converted to mp4 using MP4Box -add test.h264 test.mp4 (you may need to install gpac package using sudo apt-get install gpac)
Another option is to use ffmpeg to read compressed stream from camera. First we need to read supported formats and then use -input_format parameter. This deserves a new chapter.
Testing camera (Debian 12 Bookworm)
Added 2024-05-25
On Bookworm, raspi-config doesn’t have option for enabling camera. vcgencmd get_camera returns supported=0 detected=0, libcamera interfaces=0. After some research, camera has new interface and new commands.
1
rpicam-jpeg --nopreview --output test.jpg
1
rpicam-vid --nopreview --width 1920 --height 1080 --bitrate 3000000 --saturation 0 --intra 90 --timeout 15000 --output test.h264
Recording audio and video with ffmpeg (Debian 10 Buster)
Edit /boot/config.txt and set gpu_mem=160 in [all] section, otherwise FullHD encoding will crash (1280x720 or 1600x900 will work) If driver crashes and ffmpeg stops encoding returning error (unless you disconnect power), reload driver using root account: modprobe -r bcm2835_v4l2 && modprobe bcm2835_v4l2. It’s faster than shutdown -h now, wait for shutdown, disconnect power, wait, connect power, wait for boot.
The following command lists camera capabilities
1
v4l2-ctl -d /dev/video0 --list-formats-ext
1
2
3
4
5
6
7
8
9
10
11
12
13
14
15
16
17
18
19
20
21
22
23
24
25
26
27
28
29
30
31
ioctl: VIDIOC_ENUM_FMT
        Type: Video Capture

        [0]: 'YU12' (Planar YUV 4:2:0)
                Size: Stepwise 32x32 - 2592x1944 with step 2/2
        [1]: 'YUYV' (YUYV 4:2:2)
                Size: Stepwise 32x32 - 2592x1944 with step 2/2
        [2]: 'RGB3' (24-bit RGB 8-8-8)
                Size: Stepwise 32x32 - 2592x1944 with step 2/2
        [3]: 'JPEG' (JFIF JPEG, compressed)
                Size: Stepwise 32x32 - 2592x1944 with step 2/2
        [4]: 'H264' (H.264, compressed)
                Size: Stepwise 32x32 - 2592x1944 with step 2/2
        [5]: 'MJPG' (Motion-JPEG, compressed)
                Size: Stepwise 32x32 - 2592x1944 with step 2/2
        [6]: 'YVYU' (YVYU 4:2:2)
                Size: Stepwise 32x32 - 2592x1944 with step 2/2
        [7]: 'VYUY' (VYUY 4:2:2)
                Size: Stepwise 32x32 - 2592x1944 with step 2/2
        [8]: 'UYVY' (UYVY 4:2:2)
                Size: Stepwise 32x32 - 2592x1944 with step 2/2
        [9]: 'NV12' (Y/CbCr 4:2:0)
                Size: Stepwise 32x32 - 2592x1944 with step 2/2
        [10]: 'BGR3' (24-bit BGR 8-8-8)
                Size: Stepwise 32x32 - 2592x1944 with step 2/2
        [11]: 'YV12' (Planar YVU 4:2:0)
                Size: Stepwise 32x32 - 2592x1944 with step 2/2
        [12]: 'NV21' (Y/CrCb 4:2:0)
                Size: Stepwise 32x32 - 2592x1944 with step 2/2
        [13]: 'RX24' (32-bit XBGR 8-8-8-8)
                Size: Stepwise 32x32 - 2592x1944 with step 2/2
This one should list settings:
1
v4l2-ctl -d0 -l
This command sets bitrate of /dev/video0 (-d0) to 3Mbps (default is 10Mbps):
1
2
# Does not work on Debian Bookworm, `--list-ctrls` or -l does not work neither
v4l2-ctl -d0 --set-ctrl video_bitrate=3000000
After hours of fine tunning, reading StackOverflow and FFMpeg documentation I came with this:
1
2
3
4
5
ffmpeg -y -hide_banner \
  -f v4l2 -framerate 30 -input_format h264 -s 1920x1080 -thread_queue_size 256 -i /dev/video0 \
  -f alsa -ar 48000 -thread_queue_size 512 -i hw:1,0 \
  -filter_complex "[1:0] adelay=400|400 [filtAud]" \
  -map 0:0 -map [filtAud] -vcodec copy -acodec aac deleteme.mp4
| Parameter(s) | Explanation |
|---|---|
-y | answer yes (to output file override) |
-hide_banner | don’t show compile flags etc. |
-f v4l2 | force format |
-framerate 30 | framerate 30fps |
-input_format h264 | select h264 input format (encoding by kernel driver on GPU) |
-s 1920x1080 | size 1920x1080 (FullHD) |
-thread_queue_size 256 | worker thread queue size for next input (video) |
-i /dev/video0 | input device |
-f alsa | force format |
-ar 48000 | audio bitrate 48000 |
-thread_queue_size 256 | worker thread queue size for next input (audio) |
-i hw:1,0 | input device hw:1,0 (USB soundcard) |
-filter_complex "[1:0] adelay=400 | 400 [filtAud]" | add 400ms delay to both audio channels (left&right) |
-map 0:0 | map input #0 (v4l2), stream #0 (h264) to output |
-map [filtAud] | map filtered audio to output |
-vcodec copy | copy video input (already compressed h264 stream) |
-acodec aac | encode audio using AAC codec |
deleteme.mp4 | experimental output file |
Parameter -itsoffset 0.4 only changes time stamps of audio stream, but for example DaVinci Resolve ignores it. Filter works better. After some experiments I found out that video is delayed by 400ms for 1920x1080 and by 280ms for 1280x720. I have no idea how to tell ffmpeg that input audio is stereo and timestamps in h264 are errors in v4l2 kernel driver and/or ffmpeg that were not resolved in years and I was not able to get rid of warnings.
Good tool for audio and video sync is to record both audio and video of Audio/Video Sync Test
Sadly my notes from Aprimay 2021 mostly end here. Rest is based on very brief notes and digital archelogy and written in May 2024.
Issues
All above will likely work on more modern, powerful and power hungry Raspberries or Linux computers. Sadly, Raspberry 3B can barely encode FullHD video and audio and at the same time manage to stream it via WiFi, save it to SD card, because both CPU and USB2 speeds are far from great. I had issues with audio and video getting more and more out of sync, so I dropped idea of recoring audio completely. Once I had issue with USB bus driver resets or even complete freeze of system. Next day, issues disappeared mysteriously.
Camera trap
We have a few issues to solve.
Infrared light
Infrared light at 850nm wavelength is somewhat visible to humans when intensity is high. Fortunatelly, I’ve read that most animals can see yellow and blue and they barely see anything in red spectrum so seeing infrared light as faint red glow is human super-power. 940nm IR LEDs exists but camera efficiency is much lower.
Is infrared light harmful to eyes? LEDs from security camera are not powerful enough and exposure is not long enough to cause any harm. However, working with hot glass or metal for long periods of time is a different story, cause they emit most of the energy as infrared light.
Powering Raspberry Pi
If I recall, Raspberry PI 3B lasts roughly 5-6 hours on 10Ah powerbank because IR LEDs have high power consumption.
Shutdown in 300 minutes (5 hours) or sooner must be issued shortly after power-on
1
sudo /usr/sbin/shutdown -t +300
Setting time
By default Raspberry uses NTP (network time protocol) to get precise time. Unfortunatelly as the name suggest, it needs network connection. We’ll get there.
Pointing and verifying camera
At this point we are capable of recording video. However, we can’t see what camera sees. We need to stream data somehow and record the stream - we need nginx with nginx-mod-rtmp plugin and ffmpeg that provides data stream. Nginx is then configured to save the stream.
First, there are scripts I use to start video streaming (version from Debian Buster and Debian Bookworm):
Video capture and streaming scripts
1
2
3
4
5
6
7
8
9
10
11
12
13
14
15
16
17
#!/bin/bash
# Pavel Perina, April 2021, Debian Buster version

# set bitrate
echo "==============================================================================" >> ~/log/avrecord.txt
date >> ~/log/avrecord.txt

v4l2-ctl -d0 --set-ctrl video_bitrate=3000000
v4l2-ctl -d0 -c saturation=-100
v4l2-ctl -d0 --all >> ~/log/avrecord.txt
echo "------------------" >> ~/log/avrecord.txt

# start recording
ffmpeg -hide_banner \
    -f v4l2 -framerate 30 -input_format h264 -s 1920x1080 -thread_queue_size 256 -i /dev/video0 \
    -vcodec copy -an -strict -2 \
    -f flv rtmp:127.0.0.1/live/cam >> ~/log/avrecord.txt 2>&1 & disown -h
1
2
3
4
5
6
7
8
#!/usr/bin/bash
# Pavel Perina, 2024-05-26, Debian Bookworm version

rpicam-vid --nopreview -t 0 --width 1920 --height 1080 --saturation 0 --intra 90 --bitrate 3072000 --inline --output - | \
  ffmpeg -hide_banner  -i pipe: -vcodec copy -an -strict -2 -f flv rtmp:127.0.0.1/live/cam \
  >> /dev/null 2>&1 & disown -h

echo "Recording video. Stop it by killall ffmpeg or rpicam-vid"
Now it’s possible to connect to a camera with VideoLAN VLC player, which exists for Windows, Linux and Android Media -> Open Network Stream... -> rtmp://weasel.local/live/cam or rtmp://192.168.0.39/live/cam. How to get IP address? When connected to LAN it’s easy.
But now we need to somehow need to connect Raspberry and phone in the middle of forest.
Recording the Stream
Install nginx and RTMP mod (as root)
1
2
sudo bash
apt install nginx libnginx-mod-rtmp
This was added at the end of /etc/nginx/nginx.conf. It’s not enough to create webpage with video stream, but it’s good enough for me.
1
2
3
4
5
6
7
8
9
10
11
12
13
14
15
16
17
18
19
20
21
22
23
24
25
# Original config above skipped, this is appended to it.
rtmp {
        server {
                listen 1935;
                #chunk_size 4096;
                #notify_method get;
                #allow publish 127.0.0.1;
                #deny publish all;
                application live {
                        #on_public http://localhost/auth;
                        live on;

                        #record off;
                        record all;
                        record_path /srv/www-data/recordings;
                        record_unique on;
                        record_suffix _%Y%m%d_%H%M%S.flv;
                        record_interval 10m;

                        #hls on;
                        #hls_path /tmp/hls;
                        #hls_fragment 15s;
                }
        }
}
Create directory for recordings and change owner to user www-data so nginx can write into it. Note: I don’t know why this directory is used, there likely historic reason.
1
2
3
mkdir -p /srv/www-data/recordings
cd /srv/www-data
chown www-data recordings
Restart nginx
1
systemctl restart nginx
Verify that nginx is running by putting this into your browser
1
http://weasel.local/
Networking, connecting Raspberry Pi and Android Phone (Debian Buster)
Create entry in /etc/wpa_supplicant/wpa_supplicant.conf either manually or by wpa_passphrase PhoneSSID PhoneHotspotPassword >> /etc/wpa_supplicant/wpa_supplicant.conf which makes password harder to read, but who cares.
1
2
3
4
5
6
7
8
9
ctrl_interface=DIR=/var/run/wpa_supplicant GROUP=netdev
update_config=1
country=CZ

network={
        ssid="PavelP"
        psk="PasswordGoesHere"
}
Now RPI should connect to your phone. But getting IP address and connecting to Raspberry from phone is not that easy. Android 13 won’t even tell you IP address of connected device(s).
To get IP address we need Termux application which runs Linux shell and it’s not that straighforward, cause many utilities won’t work without root and access to /proc directory.
However this works (Zenfone 8 with Android 13)
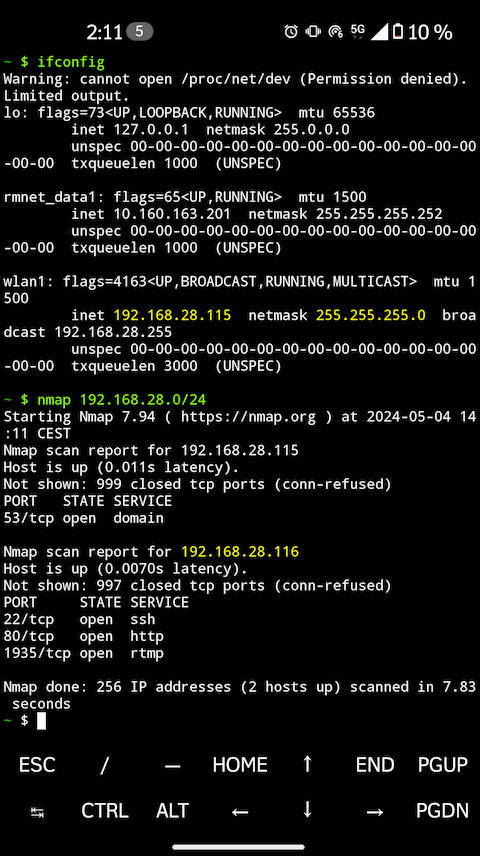
First, run ifconfig (ip neigh won’t work) and then nmap 192.168.28.0/24 or something similar, depending of ip address of hotspot returned by ifconfig to scan IP address range.
If there is something easier, please mail me. Ok, likely configuring RPI as hotspot/access point.
Now, we can login to Raspberry, set up shutdown, start streaming and verify broadcasting from camera in VLC. Adjust camera position and focus. Time synchronization can be verified by timedatectl command.
Stop unnecessary services
1
2
systemctl stop cups cups-browsed
systemctl disable cups cups-browsed
Case/box
I don’t have access to 3D printer and camera was made during lockdown. I wrapped aluminum powerbank by cardboard and masking tape, attached raspberry and camera to other pieces of cardboard using wires, zipties and more tape and then I made cardboard box using scissors and glue. It’s super ugly.
TODO: picture
How it all ended?
I recorded about 6-8 hours of video footage during two nights. Not a single animal spotted. IR light is somewhat weak. Despite it consumes lot of power, camera can see about one meter far. Part of the problem could be automatic brightness and some grass too close to camera.
Improvements:
- It’s possible to decrease power consumption, by adding motion detection sensors to GPIO pins and to turn on recording only when movement is detected. This would also help with video where nothing happens for hours and it could probably increase runtime to whole summer night.
- It’s possible to add some higher capacity/current external battery to power infrared LEDs and use stronger ones.
However these improvements would increase to the cost. On top of that, Raspberry consumes lot of power and boots slowly and i don’t think it has some low power mode.
Links
- Nina Forsyth -=- Enabling Video Streaming for Remote Learning with NGINX and NGINX Plus (What is NGINX plus?)
- Justin Ellingwood -=- How To Use Systemctl to Manage Systemd Services and Units
- Infrared Bird Box Similar project with youtube streaming.
Trash
Article ends here. These are low quality notes that need to be processed
Networking (security camera)
See what we have
1
netstat -tlupn
We don’t need a CUPS printing service
1
2
3
4
systemctl stop cups
systemctl stop cups-browsed
systemctl disable cups
systemctl disable cups-browsed
Static/Dynamic IP
Change DHCP client config to use fallback static_eth0 profile
1
2
3
4
cd /etc
cp dhcpcd.conf dhcpcd.conf.orig
nano dhcpcd.conf
diff --width=80 --suppress-common-lines --side-by-side /etc/dhcpcd.conf.orig /etc/dhcpcd.conf
1
2
3
4
#profile static_eth0                  | profile static_eth0
#static ip_address=192.168.1.23/24    | static ip_address=192.168.1.20/24
#interface eth0                       | interface eth0
#fallback static_eth0                 | fallback static_eth0
NoIP (maybe home server)
!!!!!!! TODO !!!!!!!!!!!!!!! SSH reverse tuneling (maybe to home server) Webserver with live stream Box Useful links
1
2
3
4
5
6
7
8
9
10
11
12
13
14
15
16
17
18
19
20
21
22
#!/bin/bash

# set bitrate
echo "==============================================================================" >> ~/log/avrecord.txt
date >> ~/log/avrecord.txt

v4l2-ctl -d0 --set-ctrl video_bitrate=3000000
v4l2-ctl -d0 -c saturation=-100
v4l2-ctl -d0 --all >> ~/log/avrecord.txt
echo "------------------" >> ~/log/avrecord.txt

# set audio level (device 1 (USB card) / 'Mic',0 / 25dB (30dB is max, 85%)
amixer -c 1 sset 'Mic',0 25 >> ~/log/avrecord.txt
echo "------------------" >> ~/log/avrecord.txt

# start recording
ffmpeg -hide_banner \
    -f v4l2 -framerate 30 -input_format h264 -s 1920x1080 -thread_queue_size 256 -i /dev/video0 \
    -f alsa -ar 44100 -thread_queue_size 512 -i hw:1,0 \
    -filter_complex "[1:0] adelay=400|400 [filtAud]" \
    -map 0:0 -map [filtAud] -vcodec copy -acodec aac -b:a 160k -strict -2 \
    -f flv rtmp:127.0.0.1/live/cam >> ~/log/avrecord.txt 2>&1 & disown -h
1
2
3
4
5
6
7
8
9
10
11
12
13
pi@weasel /v/www> ls -la /srv/www-data/recordings
total 9506440
drwxr-xr-x 2 www-data root          4096 May  9  2021 ./
drwxr-xr-x 3 www-data root          4096 Apr 26  2021 ../
-rw-r--r-- 1 www-data www-data 184603253 May  7  2021 cam-1620410591_20210507_200311.flv
-rw-r--r-- 1 www-data www-data 226112583 May  7  2021 cam-1620413167_20210507_204607.flv
-rw-r--r-- 1 www-data www-data 226105688 May  7  2021 cam-1620413768_20210507_205608.flv
-rw-r--r-- 1 www-data www-data 226112223 May  7  2021 cam-1620414369_20210507_210609.flv
-rw-r--r-- 1 www-data www-data  65702337 May  7  2021 cam-1620419784_20210507_223624.flv

-rw-r--r-- 1 www-data www-data 226113048 May  8  2021 cam-1620501347_20210508_211547.flv
-rw-r--r-- 1 www-data www-data 226103277 May  9  2021 cam-1620518793_20210509_020633.flv
-rw-r--r-- 1 www-data www-data 213681813 May  9  2021 cam-1620519395_20210509_021635.flv