ENG | Zephyr RTOS setup and trying code examples
Setting up Zephyr RTOS development environment and flashing provided examples to various development boards.
This article describes my first steps with Zephyr and it’s building pipeline. As installation is well documented, the article is very brief and mostly serves as useful links and keeping some commands at one place. It describes process on Windows, and on Linux, it’s very similar.
Installation
Installation process is well documented in Getting started, but time consuming. It requires at least 16GB of disk space and likely more due to prerequisites. west update and west sdk install download a lot of data from github and then create hundreds thousands files, so if I recall, installation may take over an hour on weaker hardware, such as Lenovo T480s notebook from 2017/18 and slow network or WiFi could be a factor too. Or Antivirus on Windows. On my Linux server which is based on even weaker i5-6500T it took like 10 or 15 minutes. Tbh, I’ve done Windows installation half year ago.
Only mistake I made was that when installation mentions
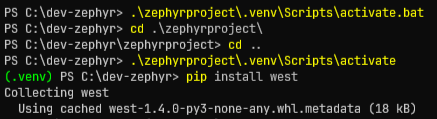
activateyou really need to run proper command for PowerShell, which is notactivate.bat. Just in case you see errors such asFATAL ERROR: Running pip install outside of a virtual environmentwhen installing west packages orModuleNotFoundError: No module named 'elftools'when building application.
NOTE: On Fedora Linux 42, which was not reinstalled for two years, I had all required packages preinstalled. Sadly, guide is only for Ubuntu.
Windows 10 specific problems (added 2025-07-01)
On Windows 10 I had to solve the following, on Windows 11 I don’t recall doing so:
1
2
3
4
5
6
7
8
9
10
11
12
13
14
15
16
17
18
19
20
21
22
23
24
25
26
27
28
PS C:\zephyrproject\.venv\Scripts> .\Activate.ps1
.\Activate.ps1 : File C:\zephyrproject\.venv\Scripts\Activate.ps1 cannot be loaded because running scripts is disabled on this system. For more information, see about_Execution_Policies at https:/go.microsoft.com/fwlink/?LinkID=135170.
At line:1 char:1
+ .\Activate.ps1
+ ~~~~~~~~~~~~~~
    + CategoryInfo          : SecurityError: (:) [], PSSecurityException
    + FullyQualifiedErrorId : UnauthorizedAccess
PS C:\zephyrproject\.venv\Scripts> Get-ExecutionPolicy -List

        Scope ExecutionPolicy
        ----- ---------------
MachinePolicy       Undefined
   UserPolicy       Undefined
      Process       Undefined
  CurrentUser       Undefined
 LocalMachine       Undefined

PS C:\zephyrproject\.venv\Scripts> Set-ExecutionPolicy -Scope CurrentUser -ExecutionPolicy RemoteSigned
PS C:\zephyrproject\.venv\Scripts> .\Activate.ps1
(.venv) PS C:\zephyrproject\.venv\Scripts> Get-ExecutionPolicy -List

        Scope ExecutionPolicy
        ----- ---------------
MachinePolicy       Undefined
   UserPolicy       Undefined
      Process       Undefined
  CurrentUser    RemoteSigned
 LocalMachine       Undefined
Next problem is that zephyr-sdk likely expects that zephyr is installed in your home directory. I needed to vaguely follow this guide. Download SDK in browser rather than using wget which is alias to some powershell command and does not show any progress for 10 minutes, I extracted it using PeaZip into my home cause why not. Then problems were consulted with LLMs and I ended by this
1
2
3
4
5
6
7
(.venv) PS C:\Users\pavel\zephyr-sdk-0.17.2> .\setup.cmd
Zephyr SDK 0.17.2 Setup

Zephyr SDK setup requires 'wget' to be installed and available in the PATH.
Please install 'wget' and run this script again.

Press any key to exit ...
Ok, maybe I need to install it
1
2
3
4
5
6
7
8
(.venv) PS C:\Users\pavel\zephyr-sdk-0.17.2> winget install -e --id JernejSimoncic.Wget
Found an existing package already installed. Trying to upgrade the installed package...
No available upgrade found.
No newer package versions are available from the configured sources.

(.venv) PS C:\Users\pavel\zephyr-sdk-0.17.2> wget

Uri:
Hmm, wget is alias to something …
1
2
3
4
5
6
7
8
9
10
11
12
13
14
15
(.venv) PS C:\Users\pavel\zephyr-sdk-0.17.2> Get-Command wget

CommandType     Name                                               Version    Source
-----------     ----                                               -------    ------
Alias           wget -> Invoke-WebRequest
(.venv) PS C:\Users\pavel\zephyr-sdk-0.17.2> Remove-Item Alias:wget

(.venv) PS C:\Users\pavel\zephyr-sdk-0.17.2> wget
wget : The term 'wget' is not recognized as the name of a cmdlet, function, script file, or operable program. Check
the spelling of the name, or if a path was included, verify that the path is correct and try again.
At line:1 char:1
+ wget
+ ~~~~
    + CategoryInfo          : ObjectNotFound: (wget:String) [], CommandNotFoundException
    + FullyQualifiedErrorId : CommandNotFoundException
Ok, this removed alias, hopefully in the current session (yes, verified)
1
2
3
4
5
6
(.venv) PS C:\Users\pavel\zephyr-sdk-0.17.2> $env:PATH += ";C:\Users\pavel\AppData\Local\Microsoft\WinGet\Packages\JernejSimoncic.Wget_Microsoft.Winget.Source_8wekyb3d8bbwe"
(.venv) PS C:\Users\pavel\zephyr-sdk-0.17.2> wget
wget: missing URL
Usage: wget [OPTION]... [URL]...

Try `wget --help' for more options.
We are getting somewhere
1
2
3
4
5
6
7
8
9
10
11
12
13
14
15
16
17
18
19
20
21
22
(.venv) PS C:\Users\pavel\zephyr-sdk-0.17.2> .\setup.cmd
Zephyr SDK 0.17.2 Setup

** NOTE **
You only need to run this script once after extracting the Zephyr SDK
distribution bundle archive.

Install host tools [Y,N]?Y
Register Zephyr SDK CMake package [Y,N]?Y

Installing host tools ...
SKIPPED: Windows host tools are not available yet.

Registering Zephyr SDK CMake package ...
Zephyr-sdk (C:/Users/pavel/zephyr-sdk-0.17.2/cmake)
has been added to the user package registry in:
HKEY_CURRENT_USER\Software\Kitware\CMake\Packages\Zephyr-sdk


All done.

Press any key to exit ...
At this point I had to uninstall Python 3.9 and 3.11, install Python 3.13, make virtual environment again. Packages are likelyly compatible. First build on Windows is super slow due to antivirus control (Defender)
Time:
- west update roughly 5 minutes
- Python packages 3 minutes
- Downloading zephyr SDK 1-2 minutes (1.6GB on 500mbit download)
- File extraction 2 minutes (Ryzen 5900X)
- Troubleshooting a bit over hour (no permission to run script, wget, Python version)
- -> total time about 80 minutes 😬 interestingly it’s not faster than installing it on Linux with way inferior hardware. Very first build of blinky was even slower due to Windows Defender.
Building package for nRF52840 Dongle and Seeed XIAO
There is a documentation for:
- nRF52840 Dongle which takes some parts from Nordic Semiconductor documentation
- Seeed Studio XIAO nRF52840 (Sense)
- XIAO Expansion Board
nrfutil command has to be downloaded from Nordic Semiconductor for nRF52840 Dongle, for both Linux and Windows.
Useful commands are
1
2
3
4
cd C:\dev-zephyr\zephyrproject
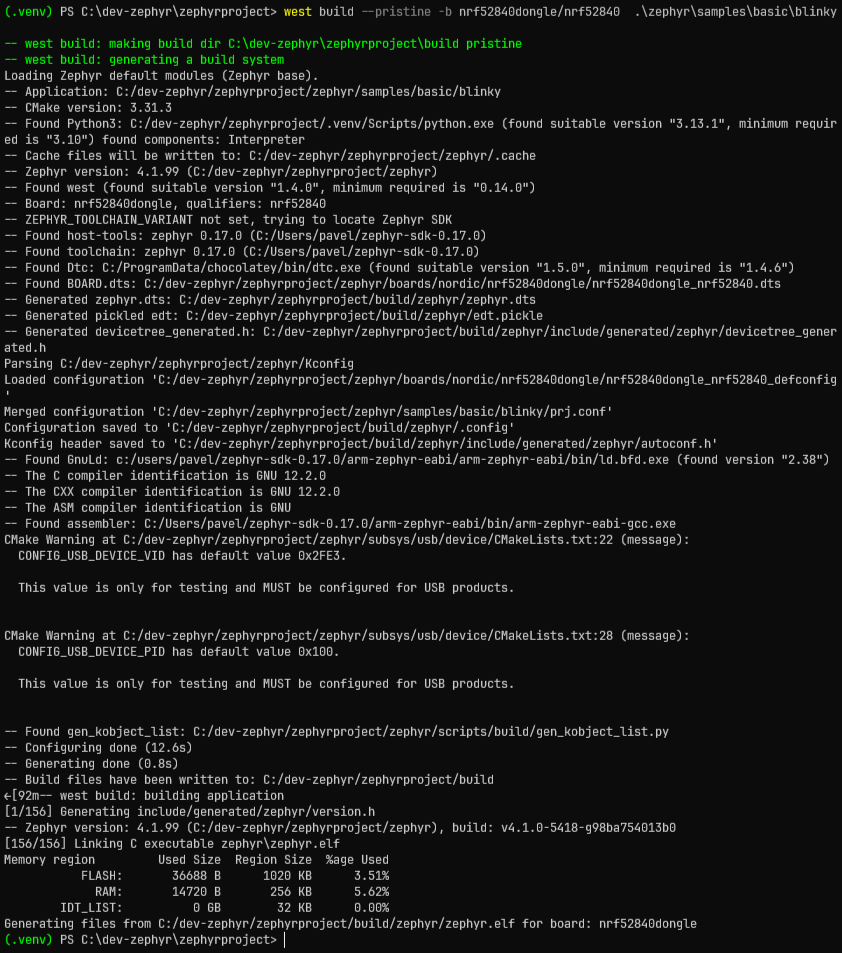
west build --pristine -b nrf52840dongle/nrf52840 .\zephyr\samples\basic\blinky
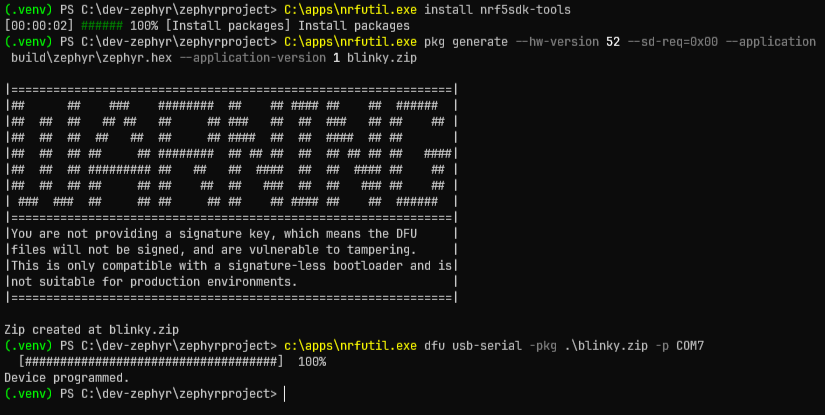
C:\apps\nrfutil.exe pkg generate --hw-version 52 --sd-req=0x00 --application build\zephyr\zephyr.hex --application-version 1 blinky.zip
c:\apps\nrfutil.exe dfu usb-serial -pkg .\blinky.zip -p COM7
or
1
2
west build --pristine -b xiao_ble/nrf52840 .\zephyr\samples\basic\blinky
cp .\build\zephyr\zephyr.uf2 d:
In both cases, device must be in boot mode. For dongle it is entered by briefly holding RESET (not SW1!) button while being plugged in. For XIAO it needs to double click RST button.
NOTE: Pristine build is needed when switching target hardware. Or path to project relative to
builddirectory.
For XIAO it ends by
1
2
3
4
5
6
7
8
[154/154] Linking C executable zephyr\zephyr.elf
Memory region         Used Size  Region Size  %age Used
           FLASH:       36632 B       788 KB      4.54%
             RAM:       14720 B       256 KB      5.62%
        IDT_LIST:          0 GB        32 KB      0.00%
Generating files from C:/dev-zephyr/zephyrproject/build/zephyr/zephyr.elf for board: xiao_ble
Converted to uf2, output size: 73728, start address: 0x27000
Wrote 73728 bytes to zephyr.uf2
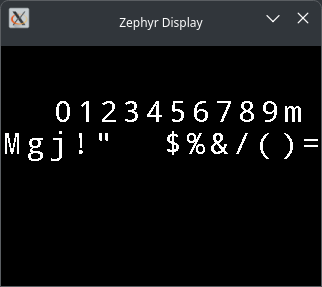
Bonus: XIAO Expansion Board Display
Can we have some fun? Watch this!
1
west build --pristine --board xiao_ble/nrf52840 --shield seeed_xiao_expansion_board .\zephyr\samples\subsys\display\cfb
1
2
3
4
5
6
7
8
9
10
11
12
13
14
15
16
17
18
19
20
21
22
23
24
25
26
27
28
-- west build: making build dir C:\dev-zephyr\zephyrproject\build pristine
-- west build: generating a build system
Loading Zephyr default modules (Zephyr base).
-- Application: C:/dev-zephyr/zephyrproject/zephyr/samples/subsys/display/cfb
-- CMake version: 3.31.3
-- Found Python3: C:/dev-zephyr/zephyrproject/.venv/Scripts/python.exe (found suitable version "3.13.1", minimum required is "3.10") found components: Interpreter
-- Cache files will be written to: C:/dev-zephyr/zephyrproject/zephyr/.cache
-- Zephyr version: 4.1.99 (C:/dev-zephyr/zephyrproject/zephyr)
-- Found west (found suitable version "1.4.0", minimum required is "0.14.0")
-- Board: xiao_ble, qualifiers: nrf52840
-- Shield(s): seeed_xiao_expansion_board
-- ZEPHYR_TOOLCHAIN_VARIANT not set, trying to locate Zephyr SDK
-- Found host-tools: zephyr 0.17.0 (C:/Users/pavel/zephyr-sdk-0.17.0)
-- Found toolchain: zephyr 0.17.0 (C:/Users/pavel/zephyr-sdk-0.17.0)
-- Found Dtc: C:/ProgramData/chocolatey/bin/dtc.exe (found suitable version "1.5.0", minimum required is "1.4.6")
-- Found BOARD.dts: C:/dev-zephyr/zephyrproject/zephyr/boards/seeed/xiao_ble/xiao_ble.dts
-- Found devicetree overlay: C:/dev-zephyr/zephyrproject/zephyr/boards/shields/seeed_xiao_expansion_board/seeed_xiao_expansion_board.overlay
.....
-- Zephyr version: 4.1.99 (C:/dev-zephyr/zephyrproject/zephyr), build: v4.1.0-5418-g98ba754013b0
[171/171] Linking C executable zephyr\zephyr.elf
Memory region         Used Size  Region Size  %age Used
           FLASH:       68952 B       788 KB      8.55%
             RAM:       33472 B       256 KB     12.77%
        IDT_LIST:          0 GB        32 KB      0.00%
Generating files from C:/dev-zephyr/zephyrproject/build/zephyr/zephyr.elf for board: xiao_ble
Converted to uf2, output size: 138240, start address: 0x27000
Wrote 138240 bytes to zephyr.uf2
(.venv) PS C:\dev-zephyr\zephyrproject> cp .\build\zephyr\zephyr.uf2 d:
Serial console (yes, mpremote is for MicroPython, but it’s convenient):
1
2
3
4
5
6
7
8
9
10
PS C:\Users\pavel> mpremote connect COM11
Connected to MicroPython at COM11
Use Ctrl-] or Ctrl-x to exit this shell
Initialized ssd1306@3c
font width 10, font height 16
font width 15, font height 24
font width 20, font height 32
x_res 128, y_res 64, ppt 8, rows 8, cols 128
*** Booting Zephyr OS build v4.1.0-5418-g98ba754013b0 ***
[00:00:00.289,123] <dbg> cfb: cfb_framebuffer_init: number of fonts 3
Bonus: nRF52840 Dongle BLE Peripheral (Heart Rate)
1
2
3
west build --pristine --board nrf52840dongle .\zephyr\samples\bluetooth\peripheral_hr\
C:\apps\nrfutil.exe pkg generate --hw-version 52 --sd-req=0x00 --application build\zephyr\zephyr.hex --application-version 1 bluetooth_peripheral_hr.zip
c:\apps\nrfutil.exe dfu usb-serial -pkg .\bluetooth_peripheral_hr.zip -p COM7
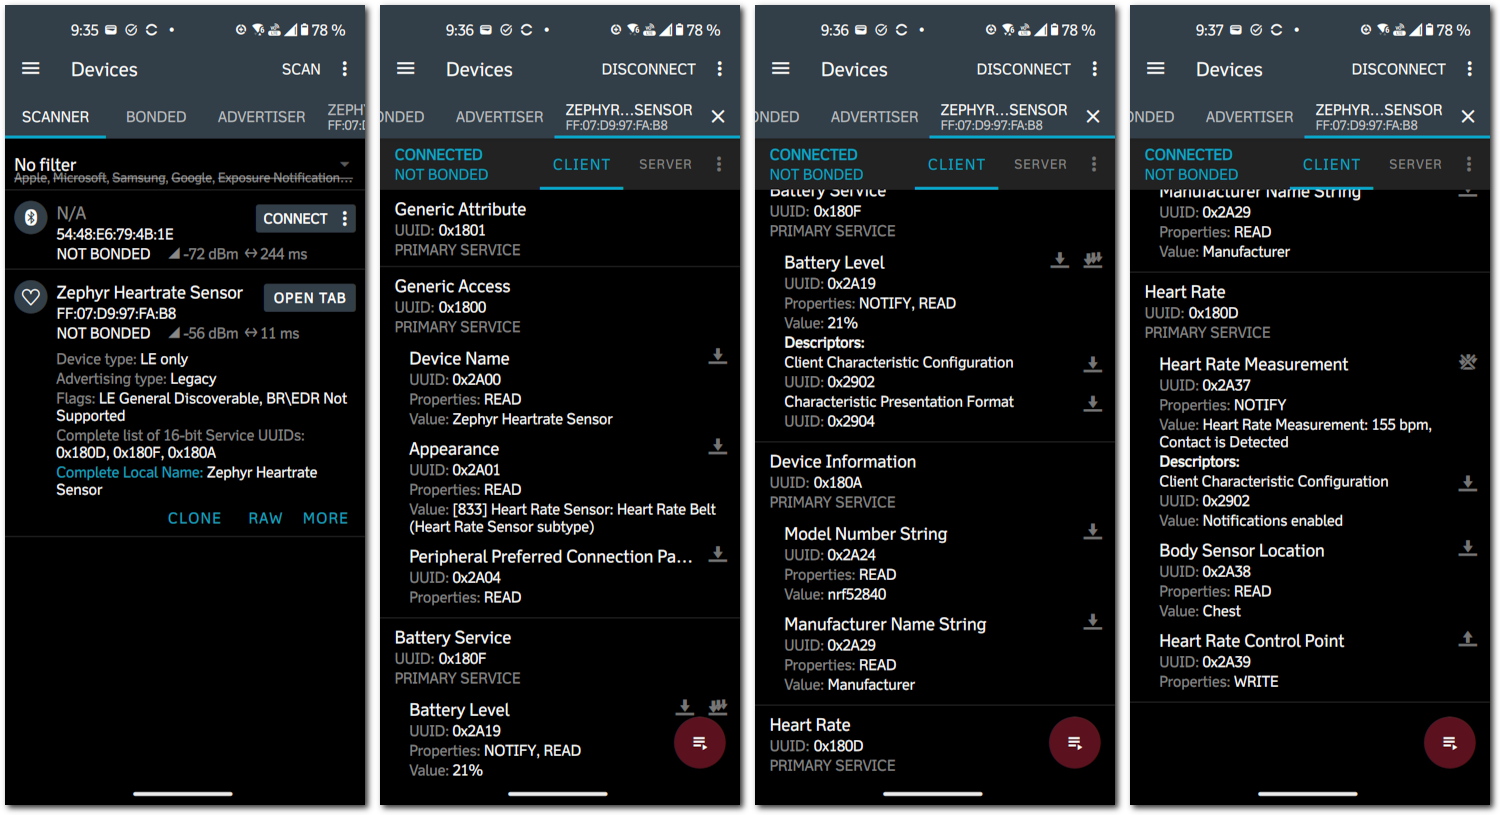 nRF Connect Mobile app showing result
Finally this dongle does something useful!
Similar is CSC example (cycling speed and cadence), which monitors wheel and crank rotations and with entered wheel diameter, it can calculate speed.
These devices can be even paired with Garmin watch, when they are in proximity.
Curiously, device name is shown as MAC address backwards, despite nRF Connect mobile shows the correct one.
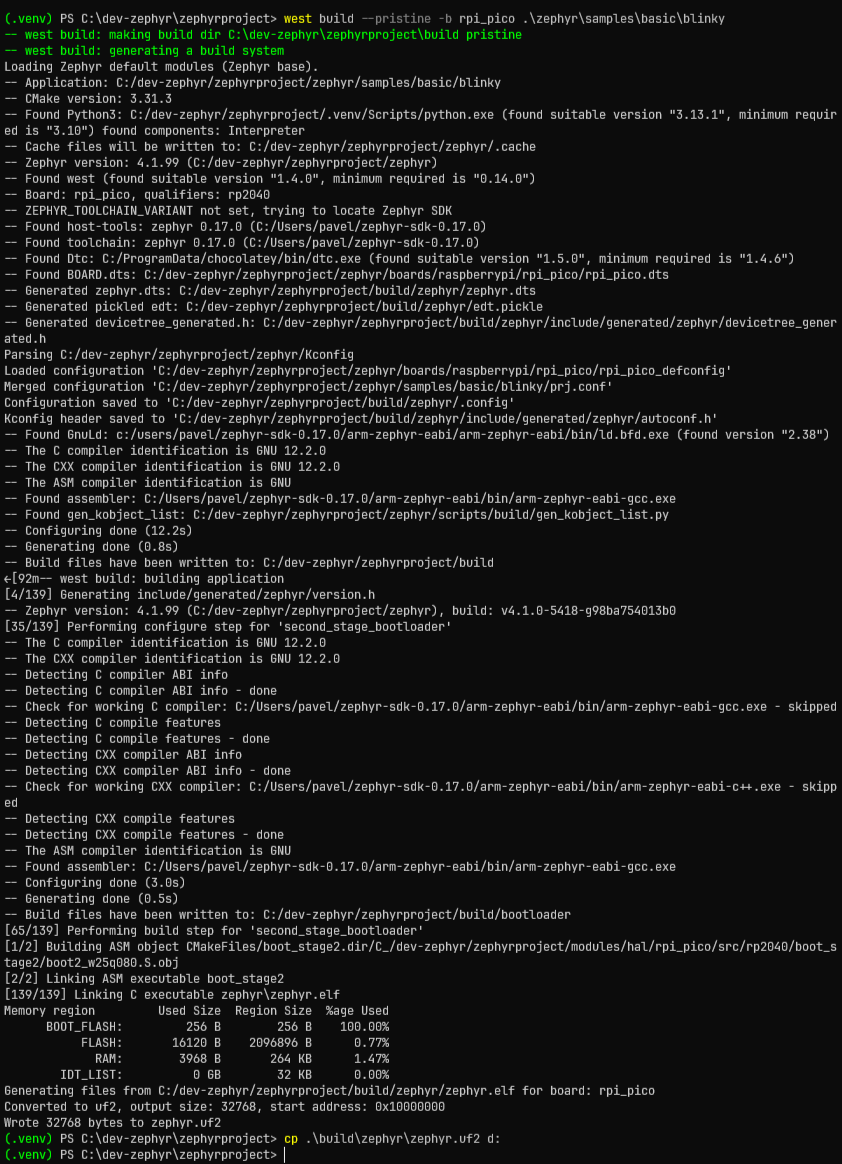
Building blinky for Raspberry Pi Pico
At the time of writing,
Raspberry Pi Pico 2 Wis likely not supported and only ARM Cortex-M33 cores are supported on Pico 2 (not RISC-V cores). I haven’t tried Pico 1 with WiFi, which requires installing wifi module bywest blobs fetch hal_infineon.Raspberry Pi Pico is said to support FreeRTOS rather than Zephyr
Documentation is here:
Boards basically differ by rpi_pico, rpi_pico2/rp2350a/m33, xiao_rp2040.
Boot mode for Picos is entered by holding BOOTSEL button while being plugged in.
Building display/cfb test application for Linux
I just had this crazy idea which can possibly help with debugging of display code which I build for XIAO Expansion Board.
Asking some AI/LLM helped a bit and suggested native_posix board. However it’s not that easy.
Attempt:
1
2
3
cd ~/zephyrproject
source .venv/bin/activate
west build -p -b native_posix zephyr/samples/subsys/display/cfb
Failure:
1
2
3
4
5
6
No board named 'native_posix' found.

Please choose one of the following boards:

xenvm
w5500_evb_pico
… roughly 500 boards listed.
Ok. This is obsolete in the latest Zephyr.
Attempt:
1
west build -p -b native_sim zephyr/samples/subsys/display/cfb
Failure:
1
2
3
4
5
6
FAILED: zephyr/CMakeFiles/offsets.dir/arch/posix/core/offsets/offsets.c.obj

/usr/include/gnu/stubs.h:7:11: fatal error: gnu/stubs-32.h: No such file or directory
    7 | # include <gnu/stubs-32.h>
      |           ^~~~~~~~~~~~~~~~
compilation terminated.
Wait. It’s 2025. Even microcontrollers are 64bit. I don’t know why default is 32bit build, I don’t have necessary libraries for Linux.
Attempt:
1
west build -p -b native_sim/native/64 zephyr/samples/subsys/display/cfb
Success:
1
2
3
4
5
6
7
8
9
10
11
12
13
14
15
16
17
18
19
20
21
22
23
24
25
26
27
28
29
30
31
32
-- Zephyr version: 4.1.99 (/home/pavel/zephyrproject/zephyr), build: v4.1.0-5582-g2c5c0e24e8fd
[97/99] Linking C executable zephyr/zephyr.elf
Generating files from /home/pavel/zephyrproject/build/zephyr/zephyr.elf for board: native_sim
[98/99] Building native simulator runner, and linking final executable
/home/pavel/zephyrproject/zephyr/scripts/native_simulator//common/src/nct.c:64:9: warning: ‘_GNU_SOURCE’ redefined
   64 | #define _GNU_SOURCE
      |         ^~~~~~~~~~~
<command-line>: note: this is the location of the previous definition
[99/99] Running utility command for native_runner_executable

(.venv) [pavel@marten -=- /home/pavel/zephyrproject]$ cd build/zephyr
(.venv) [pavel@marten -=- /home/pavel/zephyrproject/build/zephyr]$ ls -la
total 4368
...
-rw-r--r--. 1 pavel pavel 1335792 Jun 10 18:19 zephyr.elf
-rwxr-xr-x. 1 pavel pavel  778176 Jun 10 18:19 zephyr.exe
...

.(.venv) [pavel@marten -=- /home/pavel/zephyrproject/build/zephyr]$ file zephyr.elf
zephyr.elf: ELF 64-bit LSB relocatable, x86-64, version 1 (SYSV), with debug_info, not stripped

.(.venv) [pavel@marten -=- /home/pavel/zephyrproject/build/zephyr]$ file zephyr.exe
zephyr.exe: ELF 64-bit LSB executable, x86-64, version 1 (SYSV), dynamically linked, interpreter /lib64/ld-linux-x86-64.so.2, BuildID[sha1]=766a00653163beab8932bf96c473624203550bc2, for GNU/Linux 3.2.0, with debug_info, not stripped

(.venv) [pavel@marten -=- /home/pavel/zephyrproject/build/zephyr]$ ./zephyr.exe
*** Booting Zephyr OS build v4.1.0-5582-g2c5c0e24e8fd ***
Initialized sdl_dc
[00:00:00.000,000] <dbg> cfb: cfb_framebuffer_init: number of fonts 3
font width 10, font height 16
font width 15, font height 24
font width 20, font height 32
x_res 320, y_res 240, ppt 8, rows 30, cols 320
Sadly this can’t be done on Windows, cause zephyr does not include compiler for x64-86 architecture and SDL2 library, but it’s present on Linux.
Tips and troubleshooting
After playing with Zephyr, you may need to reupload MicroPython
On Windows, you may try to suppress Windows Defender from scanning files during build. Navigate to Windows Security → Virus & threat protection → Manage settings → Exclusions → Add or remove exclusions## Conclusion Add folder exclusions for
- C:\Users\your-username\zephyr-sdk-…
- C:...\zephyrproject
On Linux, drive is not always automatically mounted - I guess it’s handled by KDE Plasma. To mount it, try the following:
You may want to install
nRF DeviceTreeextension for visual studio code. It’s very useful for syntax highlighting. Then it’s possible to turn extension icon off in the side bar.
Conclusion
Installation of Zephyr is rather straightforward and very well documented, but it requires many steps and it’s a bit time consuming and resource heavy.
From what I read, C++ support and especially use of STL is somewhat limited.
Interesting aspect of Zephyr is that cpp code is decoupled from hardware description so the same code runs on different boards and does not contain constants on top of source code.
We’ll see.
At least nRF52840 dongle now seems to have some use.
Addendum: Fixing new Python version
I needed to run this after Fedora update, which updated Python from 3.13 to 3.14.
1
2
3
4
5
6
python3 -m venv ~/zephyrproject/.venv
source ~/zephyrproject/.venv/bin/activate/
cd ~/zephyrproject/
pip install --upgrade pip
pip install west
pip install -r zephyr/scripts/requirements-base.txt
Zephyr can be updated this way
1
2
3
cd ~/zephyrproject/zephyr/git fetch --tags
git checkout tags/v4.3.0
west update