ENG | Raspberry Pi Timelapse Using Systemd Timers
Set up a Raspberry Pi timelapse system using systemd timers. Learn to capture images, configure systemd service/timer files, and schedule periodic tasks.
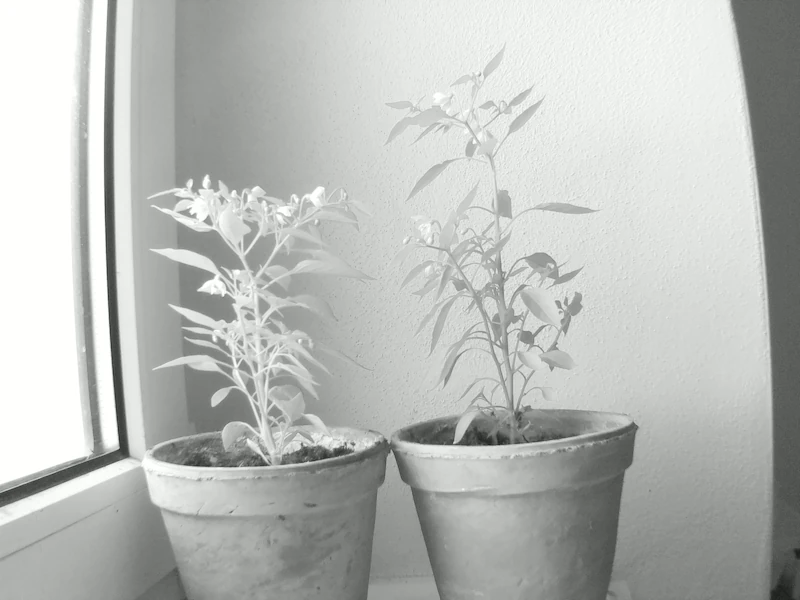
This short post was not planned, but as I was ressurecting and editing the old Raspberry Pi Camera Trap article in last days and replanting Bird’s Eye chilli peppers into flower pots, idea struck me to create a timelapse documenting chilli plants growth. Like it or not, my camera is infrared.
While setting up this timelapse system, I decided to dive into using systemd timers for scheduling the image capture, rather than the traditional cron approach. Systemd has become ubiquitous in modern Linux distributions, so this project presented an opportunity to learn more about its timer functionality. In this article, I’ll guide you through the process of capturing timelapse images and configuring systemd timers to automate the task. Additionally, I’ll touch on connecting to the Raspberry Pi over a mobile hotspot, as my setup is located the opposite corner of my flat, but preferably refer to camera trap article, as this one builds on top of it.
Timelapse Capture Script
1
2
3
4
#!/usr/bin/bash
DATE=$(date +"%Y-%m-%d_%H%M")
#rpicam-still --nopreview --saturation 0 --raw --output /home/pavel/timelapse/$DATE.jpg
rpicam-still --nopreview --saturation 0 --output /home/pavel/timelapse/$DATE.jpg
The script is straightforward – it captures a grayscale JPEG image and saves it to the /home/pavel/timelapse/ directory (ensure this directory exists). For example, an image captured at 6:46 PM on May 26, 2024, would be saved as /home/pavel/timelapse/20240526_1846.jpg. The commented line demonstrates how to capture RAW DNG images, but this option is disabled due to the limited storage space on the 8GB SD card. While RAW files would be around 11MB each, the JPEG images are approximately 800KB, making them a more practical choice for this setup, with a relatively large system installed on a small SD card.
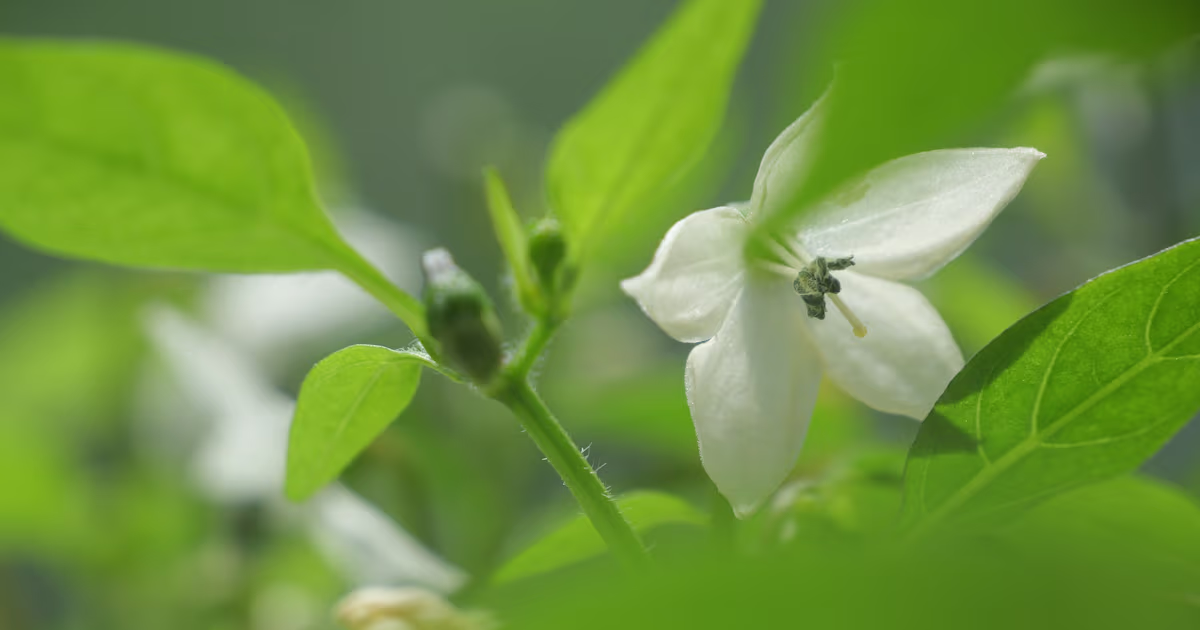
 Infrared photo of Bird’s Eye chilli
Determining Timelapse Interval
When setting up a timelapse system, the interval between captured frames is a crucial consideration. A shorter interval will provide more data points, resulting in a smoother and more detailed timelapse video, but it will also consume more storage space.
In this case, let’s consider a 5-minute interval. With 24 frames per second (fps), we would capture 288 frames per day (1440 minutes / 5 minutes = 288 frames). This translates to approximately 12 seconds of video footage per day or around 1.5 minutes per week.
Alternatively, we could double the data by using a 2-minute interval, resulting in 720 frames per day. With 60 fps, we would achieve the same video length as the 5-minute interval but with more frames, potentially reducing flicker through frame averaging. More data also gives us flexibility for post-processing and adjustments. However, with each JPEG image being approximately 800KB, a 2-minute interval would generate around 560MB of data per day (720 frames × 800KB). Given the limited free space of roughly 3GB on the 8GB SD card, the available storage would only last for barely a week.
Based on these considerations, we’ll proceed with a 2-minute interval, as it provides a good balance between data density and storage requirements for our setup.
Addendum: Two minute interval is fine for first week(s) while a plant grows a there’s some movement. Once chilli plant starts bearing peppers, it’s growth slows down and interval can be increased.
Systemd Timers
To implement the timelapse system, we’ll need two systemd files: a service file to define the task and a timer file to schedule the service execution.
Good starting point and inspiration is inspection of timers running on any Linux system:
1
systemctl list-timers # --all
1
2
3
4
5
6
7
NEXT                             LEFT LAST                             PASSED UNIT                         ACTIVATES
Mon 2024-05-27 00:00:00 CEST    17min Sun 2024-05-26 00:00:00 CEST    23h ago logrotate.timer              logrotate.service
Mon 2024-05-27 00:00:00 CEST    17min Sun 2024-05-26 00:00:00 CEST    23h ago unbound-anchor.timer         unbound-anchor.service
Mon 2024-05-27 00:07:06 CEST    24min Sun 2024-05-26 00:07:06 CEST    23h ago systemd-tmpfiles-clean.timer systemd-tmpfiles-clean.service
Mon 2024-05-27 00:17:27 CEST    34min Sun 2024-05-26 22:47:22 CEST  55min ago dnf-makecache.timer          dnf-makecache.service
Mon 2024-05-27 00:37:20 CEST    54min Sun 2024-05-26 00:05:12 CEST    23h ago plocate-updatedb.timer       plocate-updatedb.service
Mon 2024-05-27 01:19:04 CEST 1h 36min Mon 2024-05-20 01:22:28 CEST 6 days ago fstrim.timer                 fstrim.service
1
2
systemctl cat logrotate.timer
systemctl cat logrotate.service
Systemd Service file
1
2
3
4
5
6
7
[Unit]
Description="Camera Timelapse service"

[Service]
Type=oneshot
ExecStart=/home/pavel/bin/timelapse.sh
WorkingDirectory=/home/pavel/timelapse
The service file defines the name of the service and specifies the command to execute.
- The
Type=oneshotoption indicates that the service should run and exit after the command is completed, which is appropriate for our timelapse script. - The
WorkingDirectoryoption ensures that the script is executed in the correct directory (/home/pavel/timelapse), where the captured images will be saved.
Systemd Timer File
1
2
3
4
5
6
7
8
9
10
[Unit]
Description="Camera Timelapse timer"

[Timer]
OnCalendar=*:0/5
AccuracySec=30s
Persistent=false

[Install]
WantedBy=timers.target
The timer file defines the name of the timer and specifies when the service should be executed.
- The
OnCalendaroption determines the schedule for running the service. In this case,*:0/5means that the service will run every 5 minutes (when the minute value is divisible by 5). - The
AccuracySecoption specifies the accuracy of the timer, which is set to 30 seconds in this case. This means that the service may be executed up to 30 seconds before or after the scheduled time. - The
Persistentoption, when set tofalse, means that the timer will not attempt to run the service if the scheduled time is missed (e.g., due to the system being turned off). - Finally, the
WantedByoption specifies that this timer should be managed by thetimers.targetunit, which is responsible for managing all timers on the system.
Running Systemd Services As an User
The loginctl enable-linger command is used to allow systemd to manage user services and timers even when the user is not logged in. By default, systemd will stop managing user services and timers when the user logs out or disconnects from the system.
1
2
# Replace username pavel by yours
sudo loginctl enable-linger pavel
The next two commands are used to start and enable the timelapse timer
1
2
systemctl --user start timelapse.timer
systemctl --user enable timelapse.timer
Reloading Configuration
The systemctl --user daemon-reload command is used to reload the systemd configuration files. This is necessary whenever you make changes to the service or timer files, as systemd will not automatically pick up the changes.
Checking Status
1
systemctl --user status timelapse.timer
1
2
3
4
5
6
7
8
● timelapse.timer - Camera Timelapse timer
     Loaded: loaded (/home/pavel/.config/systemd/user/timelapse.timer; enabled; preset: enabled)
     Active: active (waiting) since Sun 2024-05-26 20:16:08 CEST; 42min ago
    Trigger: Sun 2024-05-26 21:00:00 CEST; 1min 43s left
   Triggers: ● timelapse.service

May 26 20:16:08 weasel systemd[807]: Stopping timelapse.timer - Camera Timelapse timer...
May 26 20:16:08 weasel systemd[807]: Started timelapse.timer - Camera Timelapse timer.
NOTE: at 20:16 daemon-reload command was issued. I changed time from 5 minutes to 2 minutes.
1
systemctl --user status timelapse.service
1
2
3
4
5
6
7
8
9
10
11
12
13
14
15
16
17
18
○ timelapse.service - "Camera Timelapse service"
     Loaded: loaded (/home/pavel/.config/systemd/user/timelapse.service; static)
     Active: inactive (dead) since Sun 2024-05-26 21:00:17 CEST; 21s ago
TriggeredBy: ● timelapse.timer
    Process: 5817 ExecStart=/home/pavel/bin/timelapse.sh (code=exited, status=0/SUCCESS)
   Main PID: 5817 (code=exited, status=0/SUCCESS)
        CPU: 2.250s

May 26 21:00:17 weasel timelapse.sh[5819]:     SGBRG10_CSI2P,640x480/0 - Score: 7832
May 26 21:00:17 weasel timelapse.sh[5819]:     SGBRG10_CSI2P,1296x972/0 - Score: 5536
May 26 21:00:17 weasel timelapse.sh[5819]:     SGBRG10_CSI2P,1920x1080/0 - Score: 4238.67
May 26 21:00:17 weasel timelapse.sh[5819]:     SGBRG10_CSI2P,2592x1944/0 - Score: 1000
May 26 21:00:17 weasel timelapse.sh[5819]: Stream configuration adjusted
May 26 21:00:17 weasel timelapse.sh[5819]: [4:23:01.096526581] [5819]  INFO Camera camera.cpp:1183 configuring streams:>
May 26 21:00:17 weasel timelapse.sh[5819]: [4:23:01.102843910] [5822]  INFO RPI vc4.cpp:621 Sensor: /base/soc/i2c0mux/i>
May 26 21:00:17 weasel timelapse.sh[5819]: Still capture image received
May 26 21:00:17 weasel systemd[807]: Finished timelapse.service - "Camera Timelapse service".
May 26 21:00:17 weasel systemd[807]: timelapse.service: Consumed 2.250s CPU time.
Other useful command it systemctl --user list-timers to list all user timers. Actually append --all to list even inactive ones.
Physical Timelapse Setup
 Raspberry Pi and camera in cardboard box
It’s ugly, but functional. Camera moves a bit with temperature or humidity changes, but it’s hardly noticeable. As you can guess, I don’t have a 3D printer.
How to Connect to Raspberry Pi
This part describes creating and connecting to mobile hotspot, cause in my case RPI is located literally in the opposite corner of my apartment than a router.
Avahi
To check what the camera sees and make any necessary adjustments, you’ll need to connect to the Raspberry Pi. One convenient method is to use the Avahi Daemon on Linux and enable mDNS on a Notebook with Windows, as described in the linked article.
This allows you to connect to the Raspberry Pi via WiFi by connecting both devices to a mobile hotspot created by your phone, and then accessing the Raspberry Pi using its mDNS name (e.g. raspi.local) without knowing it’s IP address.
Wifi configuration
By the way, wifi in configured by raspi-config and on Debian 12 it uses nmcli command and settings are stored in `/etc/NetworkManager/system-connections/
1
2
3
4
5
6
7
8
9
10
11
# Get a root shell
sudo -i
# List available access point
nmcli device wifi list
# Connect to access point with SSID PavelP and password qwerty
nmcli device wifi connect PavelP password qwerty
# Check connection file
cat /etc/NetworkManager/system-connections/PavelP
#nmcli device set <ifname> autoconnect yes
# Set connection to autoconnect (yes|no)
nmcli connection modify PavelP connection.autoconnect yes
Other useful commands
1
2
nmcli device
nmcli connection show
Pointing the Camera
For this timelapse project, capturing the growth of the plants over time is the primary goal and a perfect framing may not be crucial. However, if you need guidance on pointing and verifying the camera, refer to the Camera trap article, which covers this process in detail and this article is kind of sequel, repurposing that older project.
For the sake of simplicity, I suggest taking single images and checking them.
Transferring Files
If you need to manually transfer captured images from the Raspberry Pi to your computer for inspection or adjustments, you can use a tool like WinSCP to securely copy the files over the network connection or run some FTP server. These commands may work
1
2
3
sudo -i
apt install vsftpd
systemctl enable --now vsftpd.service
Encoding Video
On Windows I had success with these commands in PowerShell:
1
2
3
4
5
# The following command may not work and output list as UTF-8 file with BOM (byte order mark)
# Get-ChildItem .\2024-0?-??_????.jpg | ForEach-Object { "file '$($_.Name)'" } > imglist.txt
# This one is safer
Get-ChildItem .\2024-0?-??_????.jpg | ForEach-Object { "file '$($_.Name)'" } | Out-File -FilePath imglist.txt -Encoding Ascii
C:\apps\ffmpeg.exe -r 60 -f concat -i imglist.txt -filter_complex "[0:v]scale=1440x1080" -c:v libsvtav1 -an chilli_1440x1080_60fps_av1.webm
First command creates list of image files, second one creates video from them using AV1 codec and downscales it to 1440x1080 resolution.
or maybe with crop:
1
C:\apps\ffmpeg.exe -r 60 -f concat -i mylist.txt -filter_complex "[0:v]crop=2225:1669:146:78,scale=1440x1080[vid]" -map "[vid]" -c:v libsvtav1 -an chilli1440x1080_60fps_crop_av1.webm
References
- Raspberry Pi Documentation -=- Camera Software - Official documentation for the
rpicamfamily of commands, includingrpicam-stillused in this project. - DigitalOcean -=- How To Use Systemctl to Manage Systemd Services and Units - A comprehensive reference and cheatsheet for managing systemd services.
- LinuxConfig.org -=- How to schedule tasks with systemd timers in Linux - A detailed guide specifically focused on using systemd timers for task scheduling.