ENG | Nighttime Photography: Noctilucent Clouds (NLC) Timelapse
Explore the captivating world of nighttime photography with this in-depth guide on capturing noctilucent clouds timelapse. Explores the image processing pipeline with Python code and RawTherapee software to handle variable exposures when capturing this atmospheric phenomenon.
Introduction
Overview
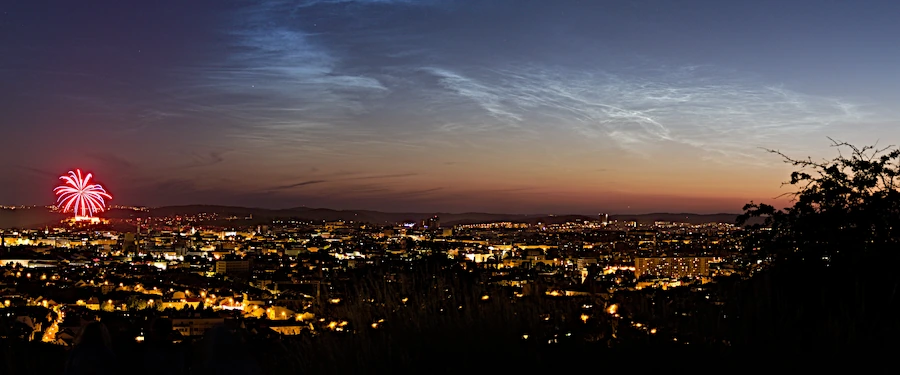 Brno, Bílá hora 2021-07-03 22:21
Capturing the dynamic play of noctilucent clouds requires more than just a click of the shutter button. While this article doesn’t delve into camera settings, it does focus on the image processing pipeline employed afterward. Specifically, the challenge of creating a timelapse with variable exposure settings is addressed.
Skill Set
Pipeline described in this article requires certain Python programming skills, so it may not be for everyone.
Prior knowledge
For foundational knowledge on nighttime photography, consult the Perseids meteor shower article. Essentially, the technique remains the same with adjustments only to exposure and timelapse timer settings.
Equipment used
A Fuji X100V camera was used, capturing shots every two seconds with a 0.77s shutter speed, ISO 160 and F2.
Luck factor
Large part of success is luck. Noctilucent clouds are visible in June and July, especially three weeks after summer solstice. The appearance of bright clouds can be rare, which adds an element of challenge and makes capturing this phenomenon rewarding. Time of appearance is roughly second half of nautical twilight which is defined by sun 6-12 below horizon. Time of nautical twilight can be found on www.timeanddate.com webpage.
Input data
Files:
| Filename | Time |
|---|---|
| DSCF2343.RAF | 2021-07-04 22:14:52 |
| DSCF3381.RAF | 2021-07-04 22:49:45 |
From this we have 1038 photos in (49-14)×60 + 45-52 = 2093 seconds. Interesting, cause when I photographed Perseids, two seconds were not enough to save photos. Another interesting thing is 0.77s shutter time, cause it’s impossible to set and I don’t know how I did it.
Processing
Explanation
I use RawTherapee a lot. It does not have the best colors without changing settings, it’s not the easiest tool to use. But it’s flexibility is noteworthy. Here we will exploit its ability to use settings from one photo and override some of them.
The table below deciphers the RawTherapee command line options utilized in the upcoming script. For a comprehensive guide, refer to the Rawtherapee documentation
| Parameter | Meaning |
|---|---|
| -o raws\2343.tif | Output filename |
| -p raws\start-2160.pp3 | Apply processing profile start-2160.pp3 (crop&resize to 3840×2160) |
| -p raws\tmp_2343.pp3 | Apply addional profile tmp_2343.pp3, which overrides the exposure |
| -b8 | Set output bit depth to 8bit per channel |
| -t | Save as TIFF (without compression) |
| -Y | Overwrite existing files |
| -c raws\DSCF2343.RAF | Specify input file (must be last parameter) |
Now we need a script that gradually changes exposure compensation and executes RawTherapee for all files. It’s better to tune it on a few images before processing 1000 photos.
Content of the first and last files (tmp_2343.pp3 and tmp_3381.pp3) will look like this:
1
2
[Exposure]
Compensation = 1.333
1
2
[Exposure]
Compensation = 4.0
The Python Script For Batch Development
1
2
3
4
5
6
7
8
9
10
11
12
13
14
15
16
17
18
19
20
21
22
23
24
25
26
27
28
29
30
31
32
33
34
35
36
37
38
39
40
41
42
43
44
45
46
47
48
49
50
51
52
53
54
55
56
57
58
59
60
61
62
63
64
65
66
67
68
# Python script to create images suitable for video from camera RAW files
# Generates .pp3 files that override defaults (profile_common)

# RawTherapee command line used for testing
# e:\apps\RawTherapee_dev_5.8-2983-g3f58095b6_20210604\rawtherapee-cli.exe -o 3229.tif -p start-2160.pp3 -p 3229.pp3 -b8 -t -Y -c DSCF3229.RAF

# Processing output tiffs (example)
# E:\apps\ffmpeg.exe -hide_banner -f image2 -start_number 2343 -i %04d.tif -pix_fmt yuv420p -f rawvideo nlc-2160p.yuv
# E:\apps\SvtVp9EncApp.exe -i .\nlc-2160p.yuv -w 3840 -h 2160 -fps 60 -b nlc-2160p-vp9-60fps.ivf
# E:\apps\SvtAv1EncApp.exe -i .\nlc-2160p.yuv -w 3840 -h 2160 -fps 60 -b nlc-2160p-av1-60fps.ivf
# E:\apps\mkvtoolnix\mkvmerge.exe .\nlc-2160p-av1-60fps.ivf -o .\nlc-2160p-av1-60fps.webm
# E:\apps\ffmpeg.exe -hide_banner -f rawvideo -vcodec rawvideo -s 3840x2160 -pix_fmt yuv420p -r 30 -i nlc-2160p.yuv -c:v libx264 -pix_fmt yuv420p nlc-2160p-30fps.mp4
# Note that last command gives you roughly 1GB file with 240Mbit bitrate
# while AV1 has 3MBs :)

#%%
import os.path
import configparser
import subprocess
from scipy.interpolate.interpolate import interp1d

num_start = 2343
num_end   = 3381

rt_client      = r"e:\apps\RawTherapee_dev_5.8-2983-g3f58095b6_20210604\rawtherapee-cli.exe"
folder         = r"g:\foto\2021\2021-07-04-nlc-kravi-hora\timelapse\raws"
profile_common = r"start-2160.pp3"

#%%
def get_raw_name(i):
    return f"{folder}\\DSCF{i:04}.RAF"

#%%
def gen_specific_pp3(i, t):
    # Modify as you wish
    config = configparser.ConfigParser()
    config.optionxform = str
    config.add_section("Exposure")
    config.set("Exposure", "Compensation", "{}".format(1.333+t*(4.0-1.333)))
    profile_filename = f"{folder}\\tmp_{i:04}.pp3"
    print("Writing " + profile_filename)
    with open(profile_filename, 'w') as profile_file:
        config.write(profile_file)

#%%
def process_raws():
    print(" ---- Processing files ----")
    file_list = open(f"{folder}\\tmp_list.txt", 'w')
    for i in range(num_start, num_end+1):
        raw_filename = get_raw_name(i)
        if os.path.exists(raw_filename):
            t = (float)(i-num_start)/(num_end-num_start)
            gen_specific_pp3(i, t)
            file_list.write(f"file '{i:04}.tif'\n")
            print(f"Processing file {i:04}")
            subprocess.run([rt_client,
                "-o", f"{folder}\\{i:04}.tif",
                "-p", f"{folder}\\{profile_common}",
                "-p", f"{folder}\\tmp_{i:04}.pp3",
                "-b8",
                "-t",
                "-Y",
                "-c", get_raw_name(i)])
        else:
            print (f"File {raw_filename} does not exist")

#%%
process_raws()
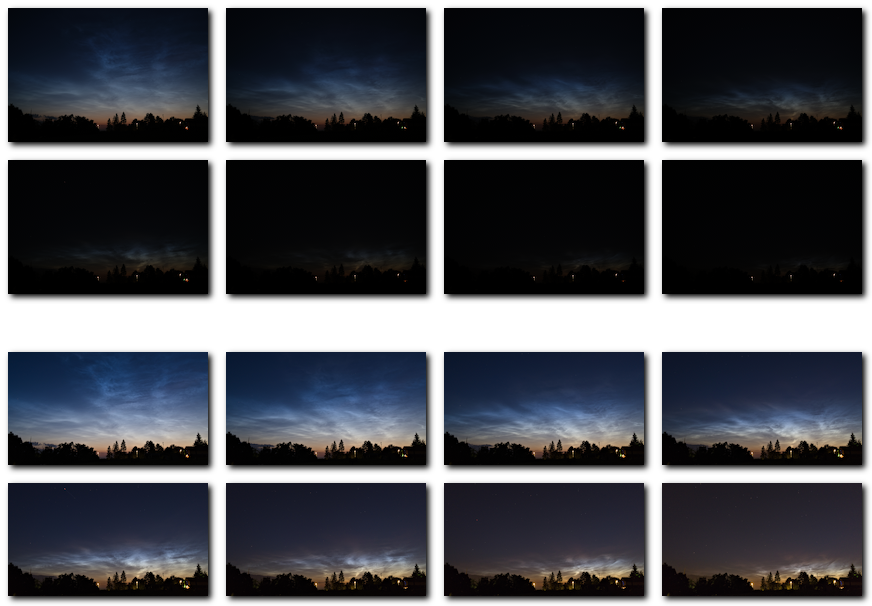
Exposure compensation result
Here, the difference in the images before and after exposure compensation is showcased. The image set includes out-of-camera JPEGs and TIFFs processed with RawTherapee.
Thumbnail images are prepared using the following shell commands
1
2
3
4
5
6
7
8
9
10
11
12
13
# Convert TIFFs to JPEGs (TIFFs can't be handled by resize_image)
parallel convert {} {.}.jpg ::: *.tif
# Resize JPEGs to width 200px and save them as `thumb_*.png`
parallel ~/bin/resize_image -w 200 {} thumb_{.}.png ::: *.jpg *.JPG
# Add shadow and save results as `sthumb_*.png` (prepend `s`)
parallel 'convert {} -bordercolor transparent -border 10x10 \( -clone 0 -page +3+3 -fill "#000000" -colorize 100% -blur 0x3 -background transparent -flatten \) +swap -composite -gravity northwest -crop +5+5 s{}' ::: thumb*.png
# Create before and after collage, 4 images side-by-side and transparent background
magick montage sthumb_????.png -geometry +0+0 -tile 4x -background none after.png
magick montage sthumb_DSCF????.png -geometry +0+0 -tile 4x -background none before.png
# merge them adding 40px transparent space south of first image
magick convert before.png -background none -gravity south -splice 0x40 after.png -append output.png
# convert to webp and copy to blog
cwebp -z 9 output.png ~/dev-blog/assets/img/nlc_exposure.webp
Creating Overlay Images
Overlay images are generated with the code based on ChatGPT4 conversation in September 2023. It would take me three times longer to write it.
1
2
3
4
5
6
7
8
9
10
11
12
13
14
15
16
17
18
19
20
21
22
23
24
25
26
27
28
29
30
31
32
33
34
35
36
37
38
39
40
41
42
43
44
45
46
47
48
49
50
51
52
53
54
55
56
57
58
59
60
61
62
63
64
65
66
67
68
69
70
71
import os
import glob
import cairo
from PIL import Image
from PIL.ExifTags import TAGS
import pandas as pd
import pvlib
from datetime import datetime

# Function to read EXIF data from JPEG
def read_exif_time(filename):
    image = Image.open(filename)
    exif_data = image._getexif()
    time_str = exif_data.get(306, "Unknown")
    return time_str

# Function to draw overlay PNG using Cairo
def draw_overlay_png(output_filename, text_list):
    width, height = 1280, 36

    surface = cairo.ImageSurface(cairo.FORMAT_ARGB32, width, height)
    ctx = cairo.Context(surface)
    ctx.set_source_rgba(0.18, 0.2, 0.25, 0.33)  # 33% transparent dark background
    ctx.rectangle(0, 0, width, height)
    ctx.fill()

    # Set text attributes
    ctx.set_font_size(20)
    ctx.select_font_face("Iosevka", cairo.FONT_SLANT_NORMAL, cairo.FONT_WEIGHT_NORMAL)
    ctx.set_source_rgb(0.56, 0.74, 0.73)  # teal text

    # Draw text
    for i, text in enumerate(text_list):
        x = 12
        if i > 0:
            text_extents = ctx.text_extents(text)
            text_width = text_extents[2]
            if i == 1:
                x = (width - text_width) / 2
            else:
                x = width - text_width - 12
        y = height // 2
        ctx.move_to(x, height-12)
        ctx.show_text(text)

    # Save to PNG
    surface.write_to_png(output_filename)

# Main program
if __name__ == "__main__":
    os.chdir("g:\\foto\\2021\\2021-07-04-nlc-kravi-hora\\timelapse\\")
    for filename in glob.glob("DSCF*.JPG"):
        # Read EXIF time
        exif_time     = read_exif_time(filename)
        parsed_time   = datetime.strptime(exif_time, "%Y:%m:%d %H:%M:%S")
        time          = pd.Timestamp(parsed_time).tz_localize("Europe/Prague")
        formatted_time = time.strftime("%Y-%m-%d %H:%M:%S")

        # Calculate sun position
        solar_position = pvlib.solarposition.get_solarposition(time, 49.2017981, 16.5864403)
        azimuth     = solar_position["azimuth"].values[0]
        elevation   = 90 - solar_position["zenith"].values[0]

        # Prepare texts
        right_text  = "Pavel Perina <p****[email protected]>"
        center_text = f"☀ elevation: {elevation:4.1f}°, azimuth: {azimuth:.1f}°"
        left_text   = f"Brno, Czechia  {formatted_time}"

        # Draw overlay PNG
        output_filename = f"overlay_{os.path.splitext(filename)[0][4:]}.png"
        draw_overlay_png(output_filename, [left_text, center_text, right_text])
Final Video Generation
The video was created using ffmpeg with support for SVT-AV1.
There are two versions. Corner and full video. Full video uses higher quality (roughly 2.5x size) cause airplanes were lost in compression.
1
2
C:\apps\ffmpeg.exe -hide_banner -framerate 60 -f image2 -start_number 2343 -i %04d.tif -framerate 60 -f image2 -start_number 2343 -i ..\overlay_%04d.png -filter_complex "[0:v]scale=1280:720[v1];[v1][1:v]overlay=0:0" -pix_fmt yuv420p -c:v libsvtav1  nlc-full-720p.webm
C:\apps\ffmpeg.exe -hide_banner -framerate 60 -f image2 -start_number 2343 -i %04d.tif -framerate 60 -f image2 -start_number 2343 -i ..\overlay_%04d.png -filter_complex "[0:v]crop=2560:1440:1280:720,scale=1280:720[v1];[v1][1:v]overlay=0:0" -pix_fmt yuv420p -c:v libsvtav1 -qp 20 nlc-crop-720p.webm
TODO: decypher commands
Results
Summary
Constructing this pipeline was a significant undertaking, and I believe that it’s somewhat unique. If you find it useful, feel free to give me credit, send me an email, or even mail me a postcard :-)