ENG | Getting started with Emscripten/WebAssembly
This article describes the very first steps with WebAssembly on Linux to transform native app into web.
The setup process is straightforward and does not require more than following instructions. It takes literally ten minutes to get Hello World working and this article is basically for reference.
Caveats? Yes, of course, adopting existing project, it’s structure, CMake files takes hours and may not be possible. Especially when it’s big, poorly structured (or does not run in loop at interactive speed), has dependencies, …
But strict separation of data and gui is a good first step.
My motivation
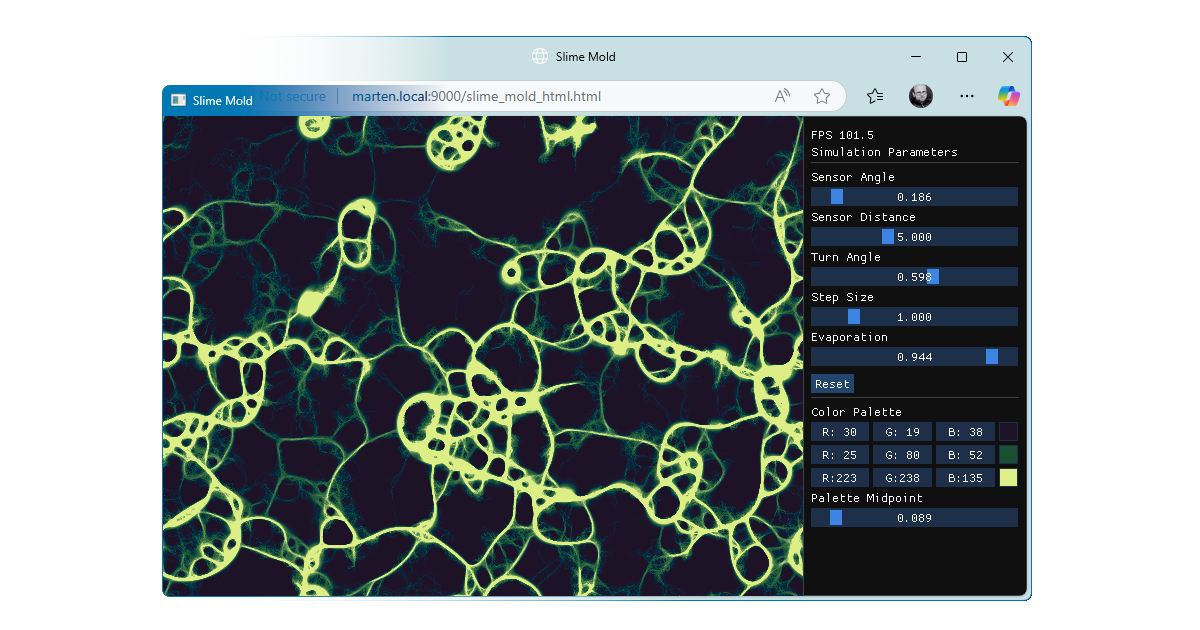
I’m trying to port slime mold simulation program that uses SDL3, ImGui and nothing else.
If you are not familar with them, here are citations from their web pages
Simple DirectMedia Layer is a cross-platform development library designed to provide low level access to audio, keyboard, mouse, joystick, and graphics hardware via OpenGL/Direct3D/Metal/Vulkan. It is used by video playback software, emulators, and popular game
Dear ImGui is a bloat-free graphical user interface library for C++. It outputs optimized vertex buffers that you can render anytime in your 3D-pipeline-enabled application. It is fast, portable, renderer agnostic, and self-contained (no external dependencies).
Getting started
Open Emscripten tutorials in browser and proceed:
- Emscripten Download
- SDL+Emscripten This one is actually quite confusing.
Then you can create hello world and try it in Browser. Simple Python http server was used for testing, it basically serves the current or specified directory.
Screenshots from installation are here, it can take literally 5 minutes and it will take roughly 1.6GB of disk space.
This process is basically the same for Windows, but there are scripts for PowerShell or old command line.
Installation and Hello world
There are some tutorials like hello world and minimal example, but let’s make hello_world.cpp in C++23 to differ.
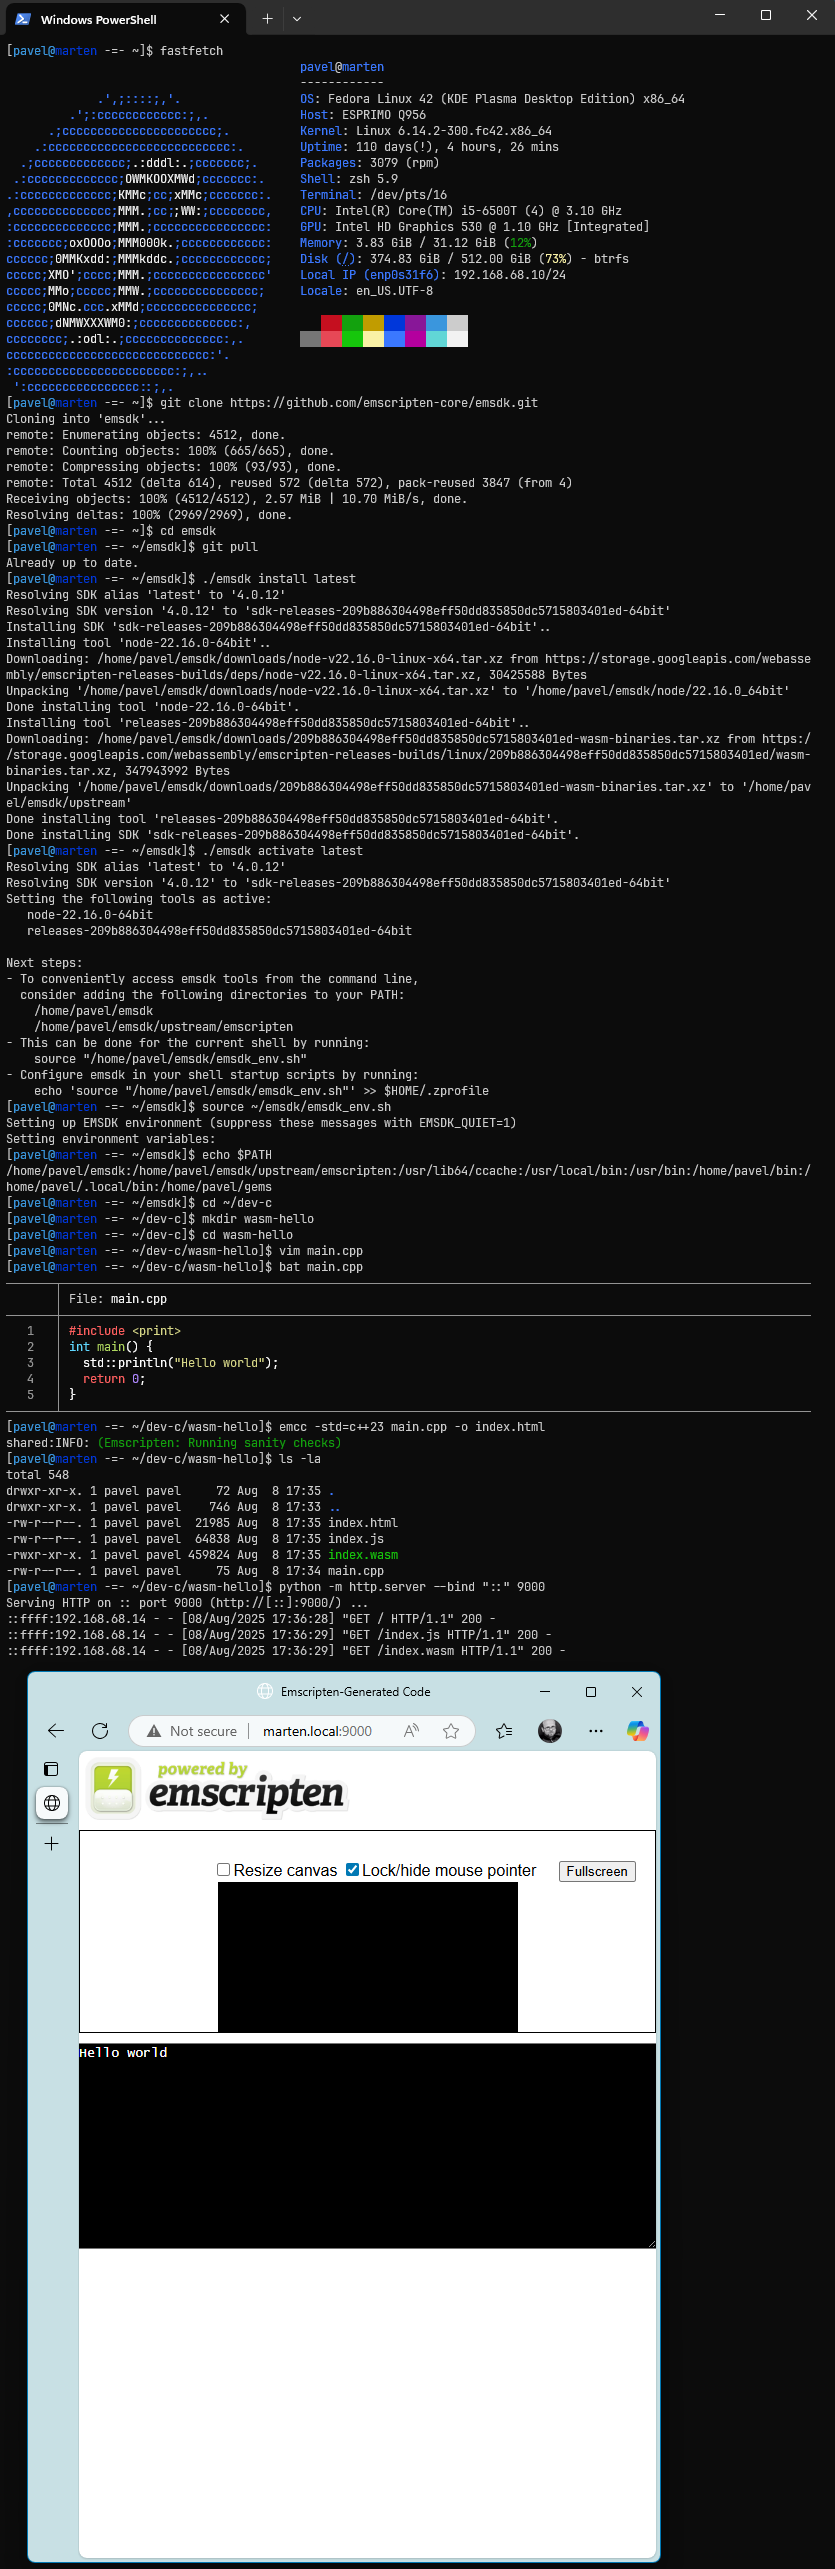 From zero to hello world
Adopting project
This is quite difficult. As mentioned already, it requires some edits to CMake files and even to main.cpp which can be adopted either to use emscripten specific functions (SDL2 solution) or it must use SDL3 callback functions while it defines main via SDL3/SDL_main.h. My Ui wrapper class has very minimal interface which basically renders next frame or say it’s done.
1
2
3
4
5
6
7
8
9
10
11
12
13
14
15
16
17
18
19
20
21
22
23
24
25
26
27
28
29
30
31
32
33
34
35
36
//! \file main.cpp

#ifdef _WIN32
//#define SDL_MAIN_HANDLED
#pragma comment(linker, "/SUBSYSTEM:WINDOWS /ENTRY:mainCRTStartup")
#endif

#include "ui_imgui/ui.h"
#define SDL_MAIN_USE_CALLBACKS
#include <SDL3/SDL.h>
#include <SDL3/SDL_main.h>

static Ui* g_ui = nullptr;

SDL_AppResult SDL_AppInit(void** appstate, int argc, char* argv[]) {
    g_ui = new Ui{};
    return SDL_APP_CONTINUE;
}

SDL_AppResult SDL_AppIterate(void* appstate) {
    g_ui->frame();
    if (g_ui->done()) {
        return SDL_APP_SUCCESS;
    }
    return SDL_APP_CONTINUE;
}

SDL_AppResult SDL_AppEvent(void* appstate, SDL_Event* event) {
    // Optional: handle events directly if needed
    return SDL_APP_CONTINUE;
}

void SDL_AppQuit(void* appstate, SDL_AppResult result) {
    delete g_ui;
    g_ui = nullptr;
}
Addendum 2025-08-21: Actually,
SDL_AppEventsis not optional for WASM build. You need to forward events tog_ui->processEvent(event);instead of using SDL_PollEvent for each frame. See this commit for details. I would swear it changed in last two weeks.
Compiling SDL3 project
Initially I expected that we need to download and compile SDL3 for emscripten, but no. After verifying this tutorial I noticed that SDL is downloaded, compiled and installed somewhere into emsdk ports directory.
 SDL is compiled once more
Basically something like this in CMakeFiles (-sUSE_SDL=3) is sufficient to build slime_mold demo. Here I used HTML and JavaScript targets. HTML generates page which is useful for debugging, while JS target can be use for embedding into existing web page.
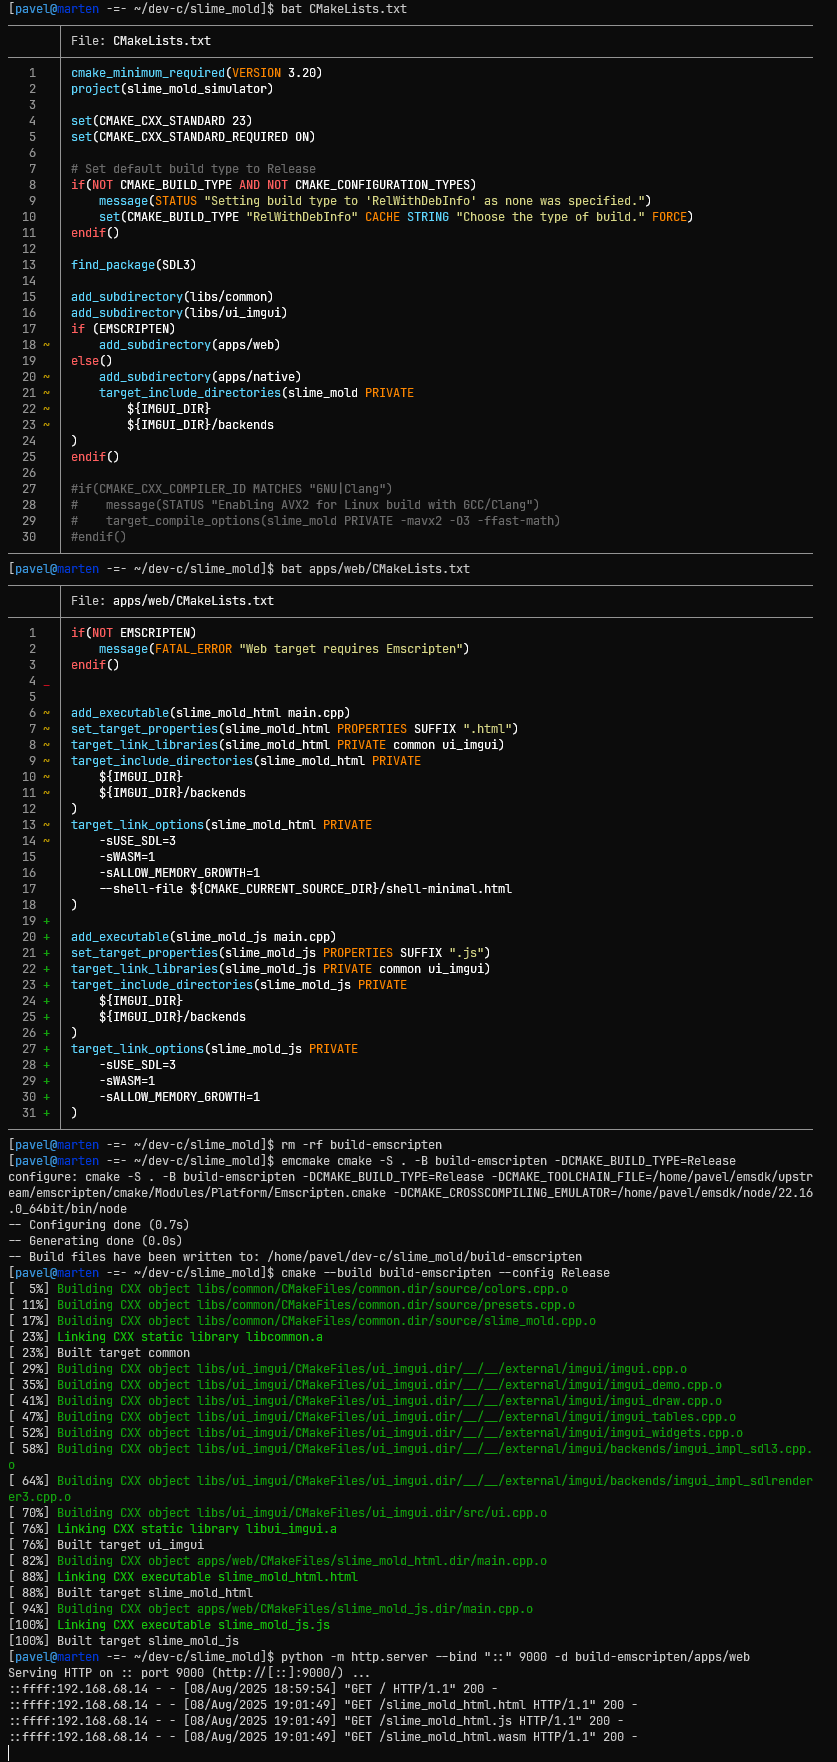 Building slime mold into WebAssembly
Including in web page
1
2
3
4
5
6
7
8
9
10
<div style="text-align:center; margin-top:20px;">
  <canvas id="canvas" width="864" height="480" style="border:1px solid #555;"></canvas>
</div>

<script>
  var Module = {
    canvas: document.getElementById('canvas')
  };
</script>
<script src="/assets/js/slime_mold_js.js"></script>
Live demo
Last updated: 2025-08-21 to v1.2
Final words
Using WebAssembly with SDL+ImGui or QML opens many possibilities for small GUI projects accessible for others without hassle of downloading them from GitHub, checking them using VirusTotal and getting them deleted by antivirus anyways.
I’m not sure if it’s limited to something like 60-70fps, but this framerate seem somewhat consistent. Even my Asus Zenfone 8 has over 50fps, nonetheless this program was not designed to run on phone, ImGui is not designed for HiDPI displays, but for fast prototyping.